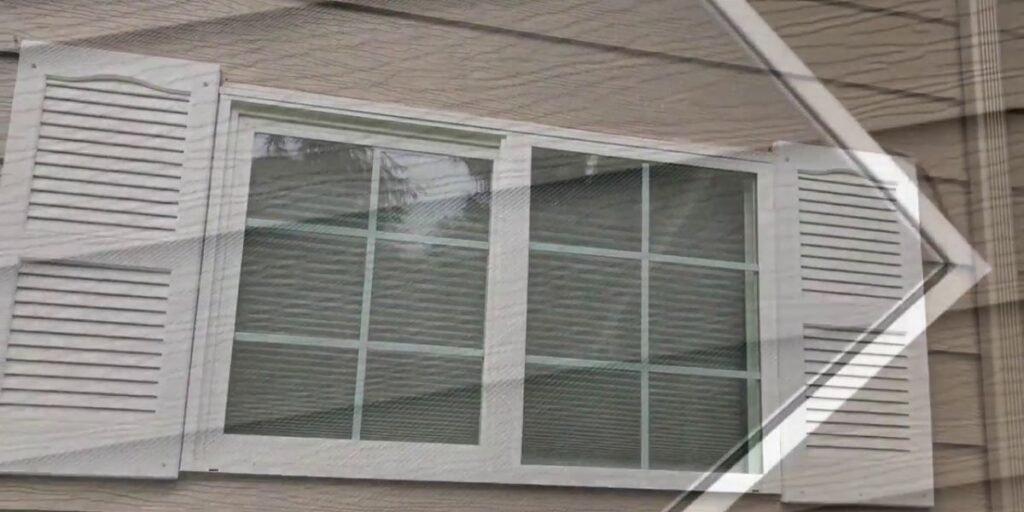
Replacing or building custom screen frames brings fresh ventilation into a home while keeping unwanted pests outside. A DIY window screen project asks for a small investment in raw materials and a few basic hand tools, yet it delivers a far better return than paying a fabricator’s custom order charges.
A standard screen assembly relies on an extruded aluminum channel frame, vinyl spline, durable fiberglass or specialty mesh, and molded plastic corners. The fiberglass insect screening most homeowners buy is woven and vinyl-coated to meet ASTM D3656, the industry specification for insect screening and louver cloth woven from vinyl-coated glass yarns. That standard is what separates a screen that holds its shape for years from cheap mesh that sags and tears within a season. Getting clean results at home still comes down to precise measurements, controlled tension during spline roll-in, and square, accurate frame cuts.
None of that requires a workshop full of specialty equipment. A screen shop and a homeowner working at a kitchen table are using essentially the same hand tools, the same spline rollers, and the same corner hardware. The only real difference is volume, and that is exactly why this is one of the more approachable weekend projects a homeowner can take on without prior building experience.
Tools and Materials for Building a Window Screen
Success depends on gathering the correct component sizes before you start assembling anything. Standard replacement screen frame kits or raw aluminum frame stock usually measure 5/16 inch or 7/16 inch thick. The lighter 5/16 x 3/4 inch profile, typically rolled from .019 gauge aluminum, handles most residential double-hung and sliding windows just fine, while the heavier 7/16 x 1 inch stock is worth the extra cost on larger openings or any frame where you plan to drill through for plunger latch hardware, according to specifications published by Quality Screen Company.
- Aluminum frame stock or a universal window screen frame kit, cut to your window’s dimensions
- Square corner connectors matching your frame’s thickness exactly
- Screen mesh, in standard fiberglass, pet-resistant vinyl-coated polyester, or solar screen mesh
- Vinyl spline, sized from 0.125 inch up to 0.250 inch based on your frame’s groove depth
- Spline roller with both convex and concave wheels
- Tape measure marked with 1/16-inch precision increments
- Hacksaw fitted with a 32 TPI metal-cutting blade
- Utility knife with fresh razor blades
- Heavy-duty scissors or shop shears
- Framing square or speed square
How to Build a Window Screen in 10 Easy Steps
1. Measure the Window Opening
Building a frame begins with accurate measurements of the window track opening. Even small calculation mistakes leave gaps or cause binding inside the channel later.
Run your tape measure across the frame track horizontally at three distinct points: the top rail, center point, and bottom sill. Record each measurement down to the nearest 1/16 inch.
Repeat the process vertically across the left side, center line, and right side of the opening track. Houses settle over time, and that settling frequently distorts window openings away from perfect square alignment, sometimes by more than an eighth of an inch on either side.
Always select the smallest figure from your horizontal and vertical measurements. Using a larger value risks a finished screen frame that binds or buckles inside the window opening during installation, which is one of the most common mistakes first-time builders make.
Inspect the window channel interior for physical obstructions, including built-in stop beads, drainage weep hole covers, or screen retainer tracks. These obstacles affect overall clearance and determine where your final frame edge should sit. Determine your final cut dimensions by calculating corner connector deductions. Standard square plastic corner inserts usually add 1/2 inch to 3/4 inch total length across both ends, so calculate your exact cut lines against your specific kit’s stated dimensions rather than guessing.
If you are replacing several screens on the same house at once, a story pole (a scrap strip of wood marked with each window’s actual opening size) saves you from mixing up measurements between similarly sized but not identical openings. Older homes especially can have four “same size” windows that differ from each other by a quarter inch or more once you actually measure each one.
2. Cut the Frame Pieces to Size
Transfer your calculated cut measurements onto the aluminum frame stock using a sharp fine-tip permanent marker or scribe tool. Double-check every line before bringing a saw blade anywhere near the metal.
If your aluminum frame stock came pre-packaged with vinyl spline already sitting in the channels, pull that spline out completely before marking or cutting. Leaving spline in place during cutting creates jagged edges and ruins the vinyl.
Lay the aluminum rail flat against a stable work surface and secure it with a C-clamp or bench vise. A hacksaw fitted with a 32 teeth-per-inch metal-cutting blade produces smooth, burr-free cuts through thin aluminum extrusions without tearing the metal, which is exactly why professional screen shops keep that blade count on hand rather than a coarser wood-cutting blade.
Hold the hacksaw at a 90-degree angle to the frame body to keep every cut square across the entire profile. Any deviation on cut angles leaves gaps at the corner connections, and those gaps weaken the structural rigidity of the finished frame.
Smooth away sharp metal burrs along cut edges with a fine-grain metal file or coarse sandpaper. Removing burrs prevents cut fingers during assembly and lets the corner connectors seat fully inside the frame ends.
If you are building more than two or three screens in one session, a power miter saw fitted with a fine-tooth, non-ferrous metal blade will square up cuts faster than a hacksaw without sacrificing accuracy, which is the same shortcut most screen shops use once volume goes up. For a single window, though, the hacksaw and a steady hand are all you need.
3. Assemble the Screen Frame
Lay out your four cut aluminum rails on a flat table surface, arranged in their final rectangle orientation. Make sure all four spline channel grooves face upward toward you.
Push a molded corner connector into each open end of one horizontal rail piece. Apply firm, steady thumb pressure until the corner shoulder sits flush against the cut aluminum edge.
Align the remaining vertical side rails onto the exposed corner connector pegs. Press the frame pieces together until the joints lock flush without any visible gap along the seam line.
Avoid hitting aluminum rails directly with a steel hammer, since that dents light-gauge channels almost instantly, especially the standard .019 gauge stock most residential kits use. If a corner connector resists entry, tap it lightly with a rubber mallet or a scrap wood block instead.
Verify that all four plastic corners have seated completely into the aluminum frame. Uneven seating throws off the finished screen dimensions and causes frame warping once spline tension is applied in later steps.
Choose square corners for a straightforward rectangular window and save keyed, mitered corners for visible applications like a porch screen door frame, where the tighter seam actually shows.
4. Check the Frame for Fit and Squareness
Lay your assembled aluminum frame onto a flat workbench surface. Place a framing square against each internal corner joint to verify that adjacent rails meet at a precise 90-degree angle.
Check squareness a second way by measuring diagonally across the frame from opposite outside corners, forming an X pattern. When both diagonal measurements match within 1/16 inch, your frame is square and ready to proceed.
Test the unmeshed frame by setting it directly inside your target window track opening. Catching a sizing problem at this stage lets you correct rail lengths before you have invested time in mesh and spline.
Inspect the perimeter gap around the test-fitted frame to confirm there is enough clearance for tension springs or plunger latches, wherever your hardware calls for it.
If the frame bows outward or resists fitting inside the track opening, fix the squareness or adjust rail lengths now. Pulling installed mesh and spline back out later wastes both materials and time you will not get back.
A frame that is slightly too large for a settled opening is a far easier fix at this stage than one that is too small. Trimming another sixteenth of an inch off a rail takes two minutes, while a short frame usually means starting the cut list over.
5. Cut the Screen Mesh
Unroll your chosen screen mesh material over a clean, flat table surface. Position the screen frame directly beneath the mesh so the spline channel grooves face straight up.
Unroll enough mesh to extend past the outside edges of all four frame rails by at least 1 to 1.5 inches. That overhang gives your spline roller tool the material it needs to grip properly.
Align the natural weave pattern of the mesh parallel to the aluminum frame edges. Crooked alignment produces a visible diagonal wave pattern once the spline is pressed down and the mesh is under tension.
Cut the mesh cleanly with sharp heavy-duty scissors or a fresh razor blade. Avoid stretching or pulling the fibers while you cut across the roll width, particularly with a specialty weave like PetScreen or SunTex, both of which are noticeably denser than standard fiberglass and will fray unevenly under a dull blade.
Keep excess mesh clear of your immediate working path. Material curling over the corners can snag the roller during spline rolling and tear the mesh right when you are trying to finish the job.
Save any large offcuts rather than discarding them. A scrap of matching mesh is exactly what you will want on hand the next time a corner gets snagged by a screwdriver or a determined cat, and buying a full roll for one small patch job is rarely worth it.
6. Start the Spline in the Frame
Position the mesh centered over the frame with equal overhang on all four sides. Hold it flat against the frame using spring clamps or heavy painter’s tape along two sides.
Choose one top corner of the frame to begin your spline installation. Confirm your spline diameter against your frame’s groove width first. Phifer’s own sizing guidance lists spline in .125, .140, .160, .175, .190, .210, .220, and .250 inch diameters, and it recommends going one size smaller than your frame’s stated groove size whenever you are installing a heavier specialty mesh like PetScreen or a solar screen, since the added fabric thickness fills the channel faster than standard fiberglass does, according to Phifer’s spline sizing guide.
Place the end of your vinyl spline directly over the channel groove at that starting corner. Use the pointed end of a plastic spline roller or a flat-head screwdriver to push the initial spline tip into the corner groove until the vinyl seats against the channel bottom.
Hold the starting corner spline anchored firmly with one thumb so it cannot pull free while you work. Keep light tension on the loose spline cord with your free hand as you align it over the channel line.
Avoid stretching the vinyl spline as you start the run. Overstretched spline thins out during installation and eventually snaps back, pulling loose from the corners over time, which is one of the more frustrating repairs a homeowner ends up making twice.
Work on a mild day if you have any choice in the timing. Vinyl spline gets noticeably stiffer and more prone to cracking in cold temperatures, and it becomes easier to overstretch once it warms up in direct sun, so a shaded workbench on a moderate afternoon gives you the most forgiving material to work with.
7. Secure the Mesh With the Spline
Guide your spline roller along the channel, pushing the spline cord down into the groove over the screen mesh. Use the convex wheel first to push the mesh into the groove, then follow with the concave wheel to seat the spline itself. Roll the tool in smooth, continuous forward strokes along the rail length. Hold the roller handle at a slight 45-degree angle relative to the frame channel so the wheel does not slip out of the groove mid-stroke.
Keep light, outward pulling pressure on the mesh with your off-hand as you roll down each rail. Tom Silva, the longtime general contractor on This Old House, makes the same point about screen tension regardless of frame material: mesh needs to end up taut without ever being pulled beyond its natural give, because overworking it strains the frame and undoes the fit you spent the earlier steps getting right, per his technique described on This Old House. Pull just enough to remove visible slack, nothing more.
Work your way around the frame in a continuous loop, top rail, side rail, bottom rail, and the final side rail. Turn each corner by pushing the spline into the corner angle with the roller tip.
Avoid pulling the mesh too tight during installation. Excessive tension causes lightweight aluminum side rails to bow inward like an hourglass, which prevents the screen from sealing properly against the window stop later. Cut the vinyl spline with utility shears once you return to your starting corner joint. Press the final spline end firmly into the starting groove junction to close the loop.
Buy spline in a color that reasonably matches your frame finish. Black spline against a bright white frame is a small cosmetic detail, but it is the kind of thing that catches a buyer’s eye if the house ever goes on the market.
8. Trim Away the Excess Mesh
Check the entire frame channel perimeter to confirm the vinyl spline sits evenly below the top channel lips. Re-roll any high spots you find before you start trimming.
Hold a sharp utility knife flat against the outer wall of the aluminum frame’s spline groove. Orient the blade pointing outward, away from the finished center screen area.
Slice through the excess mesh overhang by dragging the blade smoothly down the outer edge wall of the channel. Apply moderate, controlled pressure to cut cleanly in a single pass rather than sawing back and forth.
Keep every cut anchored against the aluminum channel’s metal wall as a guide. A slip inward across the tensioned spline will cut straight through your finished screen mesh, ruining the entire panel after all the work that got you here. Clear away the trimmed mesh strips and discard them. Inspect the perimeter channel one more time to confirm no loose strands or unfinished fibers project above the spline seam.
9. Add the Required Screen Hardware
Install mounting hardware based on your specific window channel setup. Common components include top tension springs, side plunger latches, or bottom lift tabs, and the right combination depends entirely on how your window track was originally designed.
Slide flexible steel tension springs into the outer frame channel before installing your final corner pieces, or snap surface-mount spring versions directly into the side rail slots. Tension springs press the screen against the opposite track wall and are what actually hold the finished frame in place day to day.
Attach clear vinyl lift tabs into the bottom edge spline groove during mesh installation if your frame sits in a deep window sill track. Lift tabs give you a finger grip for removing the screen later without prying at the mesh itself.
For wood-frame windows or flat exterior casing mounts, install swivel screen clips or turn buttons directly into the surrounding wood trim with corrosion-resistant screws instead of relying on spring tension.
Verify that all spring hardware compresses smoothly without binding against the aluminum frame edges. Proper spring action is what keeps a finished screen aligned inside its track through wind and everyday use. Use corrosion-resistant screws, stainless steel or coated deck screws rather than plain steel, on any hardware you are attaching directly to wood trim. A screw that starts rusting in a humid climate will eventually stain the surrounding wood and weaken its own grip long before the mesh itself wears out.
10. Install the Finished Screen and Check the Fit
Take the completed window screen to its target window location. Angle the frame to pass it through the open sash, keeping the pull tabs facing toward the interior of the room.
Insert the top or spring-loaded side of the screen frame into the deepest section of the window track. Compress the tension springs fully against the channel wall as you go.
Pivot the bottom or opposite side of the screen frame inward over the sill track edge. Release your hand pressure slowly and let spring tension center the frame inside the window channels on its own.
Check the perimeter of your installed screen for visible light gaps or fit errors. The frame needs to sit flush against the window to stop molding to block insects completely, not just mostly.
Test removal and reinstallation using the pull tabs to confirm the frame releases cleanly without binding. A well-constructed screen stays rigid, holds even tension across the mesh, and slides in and out of the window track without a fight, which is the real sign that every earlier step was done correctly.
A light spray of silicone-based lubricant, not petroleum grease, on the window track once or twice a year keeps future removal just as smooth as it is today, and it costs a fraction of what a service call for a stuck screen would run.
Given that a single professional replacement now averages $317 and materials for the same job run closer to $10 to $25, a Saturday afternoon spent on this project is one of the higher-return jobs available to any homeowner willing to measure twice and cut once.