Growing tomatoes at home is one of the most rewarding endeavors you can take on in your backyard or container garden. There is an unmistakable difference between plucking a sun-warmed tomato off your own vine and buying a mealy, pale fruit from the supermarket shelf. Beyond the incredible flavor, homegrown tomato plants add structure and vibrant green life to your outdoor space, turning even a modest patio into a productive food-producing zone.
I have been growing tomatoes in my home garden for more than 12 years, and over that time I have learned that the best harvests start long before the plants ever touch the garden soil. Getting the timing right when starting seeds indoors is one of the factors that makes the biggest difference between a struggling vine and a heavy producer.
If you want to master this process, you need to know when to start your seeds, how to care for delicate seedlings without overcomplicating things, when to safely move them outside, and how to avoid ending up with weak, leggy plants that refuse to thrive. This guide covers a practical home-gardening approach based on what actually works season after season.
When To Start Tomato Seeds Indoors
Timing is everything when it comes to starting warm-season crops indoors. If you start your seeds too early, you end up with massive, root-bound plants that are stressed before they ever see the sun. If you start too late, your harvest gets pushed back into the cooler days of autumn.
As a general rule, aiming for 6 to 8 weeks before your planned outdoor planting date is the sweet spot used by home gardeners everywhere, while some agricultural extension programs recommend narrowing that window to 5 to 6 weeks depending on your indoor setup.
Never blindly count backward eight weeks from an arbitrary date on the calendar. Instead, follow a precise logistical calculation:
- Find your expected outdoor tomato planting date based on local frost patterns
- Count backward 6 to 8 weeks from that specific threshold
- Schedule your indoor seed sowing right inside that window
Your local last spring frost date dictates your outdoor planting schedule. For example, if your garden is reliably safe from frost and warm enough for tomatoes around May 15, starting your seeds indoors during late March or early April gives you plants of ideal size.
Both Cornell University and Rutgers Cooperative Extension advocate for this backward-counting approach. The University of New Hampshire Cooperative Extension similarly gives tomatoes a 6 to 8 week seed-to-transplant window and emphasizes setting them out only after all danger of frost has completely passed.
Resist the temptation to assume that the earliest possible start gives you the earliest tomatoes. A compact, healthy six-week-old transplant will always outperform a lanky, stressed ten-week-old plant that has outgrown its container indoors.
Starting Tomato Seeds And Raising Healthy Seedlings Indoors
Once your calendar window opens, the actual process of sowing and raising your seedlings requires clean materials and steady attention. When I prepare to sow my seeds, I never scoop dirt directly from outdoor garden beds. Rutgers specifically warns that garden soil can introduce soil-borne pests, weed seeds, and fungal disease organisms that thrive in warm indoor environments.
Instead, I use a lightweight, sterile soilless seed-starting mix made from peat moss and perlite. Some gardeners like to experiment with custom worm-casting blends or vermiculite-heavy media to boost early nutrient retention, but a clean, fluffy commercial mix provides the ideal balance of moisture and aeration for germination.
When sowing your seeds, follow a straightforward planting rhythm:
- Moisten your growing mix thoroughly before placing any seeds in the containers
- Plant tomato seeds shallowly, burying them about 1/8 to 1/4 inch deep
- Cover the seeds lightly with the mix and press down gently to ensure good seed-to-soil contact
- Keep the medium evenly moist rather than waterlogged by misting it with a spray bottle
- Provide consistent warmth to trigger sprouting, aiming for 75 to 90 degrees Fahrenheit as recommended by Cornell, while Minnesota Extension notes that 75 to 85 degrees Fahrenheit works well for fast germination
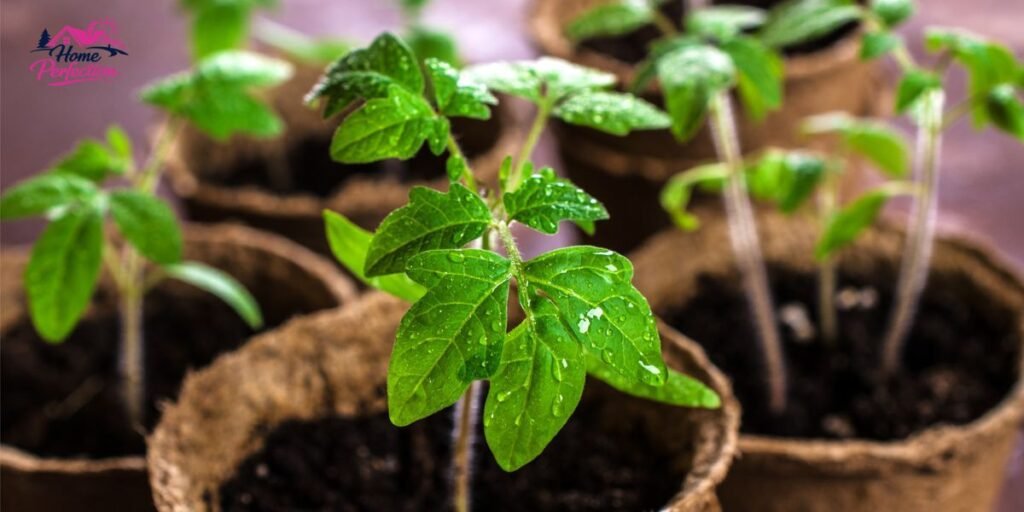
The moment those first green loops break through the surface of the soil, my focus shifts immediately from warmth and moisture to light. This is the exact stage where many otherwise healthy tomato seedlings stretch out and become tall, weak, and leggy.
A dim windowsill is rarely enough. Cornell points out that even a bright south-facing window can leave seedlings starved for photons during early spring, which is why Minnesota Extension recommends setting up bright overhead fluorescent or LED shop lights just a few inches above the foliage.
As the seedlings develop their first set of true leaves and their roots begin filling their original seed cells, give them more room. I never transplant my seedlings simply because a certain number of days have passed on a calendar. I watch the plants instead.
When inspecting your seedlings for the move to larger individual pots, look for:
- Vibrant, healthy green leaves with no sign of yellowing
- Thick, sturdy stems that stand upright without leaning
- A compact growth habit rather than thin, stretching stalks
- A robust root system holding the growing medium together in a tight plug
Avoid the urge to heavily fertilize young seedlings. Overfeeding is not a shortcut to a better transplant; in fact, excess nitrogen at this stage forces rapid, weak growth. My ultimate goal indoors is never to grow the largest possible houseplant. I want a compact, stocky plant with a strong root system that can handle the transition to the garden without missing a beat.
How To Know Your Tomato Seedlings Are Ready For The Garden
Knowing when to transition your tomatoes outside is just as important as knowing when to start them. Age is a helpful guideline, but it is never the final test.
A prime tomato transplant ready for the garden should look short and thick-stemmed, actively growing, well-rooted, and free of any stress or nutrient deficiencies. Penn State Extension notes that warm-season crops like tomatoes require careful attention to temperature because cold spring conditions will stunt their growth even if there is no actual frost.
When determining the exact timing to shift your plants into the permanent garden beds, look for these specific parameters:
- The seedlings have reached 6 to 10 inches in height with sturdy main stems roughly the thickness of a pencil
- They feature multiple robust sets of true leaves and a well-established root system that holds the root ball together when unpotted
- All danger of spring frost has completely passed and daytime temperatures consistently hover above 65 to 70 degrees Fahrenheit
- Nighttime temperatures reliably remain above 50 to 55 degrees Fahrenheit for several consecutive nights
- Soil temperatures taken at a four-inch depth have warmed up to at least 60 degrees Fahrenheit
The calendar tells you when to start preparing your supplies, but the plant and the weather tell you the exact day to plant.
Hardening Off And Planting Tomatoes Outside
Tomatoes raised indoors live a sheltered life protected from direct UV rays, drying winds, and fluctuating outdoor temperatures. If you take a tender indoor plant and drop it straight into the garden bed on a sunny afternoon, the leaves will scorch and the plant may collapse.
To prevent this shock, you must harden off your seedlings over a span of one to two weeks. Minnesota Extension recommends starting this transition by placing the plants in a shady, protected outdoor spot for a couple of hours, then gradually increasing their exposure to direct sunlight and wind each day. Penn State echoes this timeline, noting that about a week of progressive outdoor exposure builds the necessary cuticle thickness on the leaves.
Once hardening off is complete, pick a calm, overcast day for planting if possible, avoiding installation right before a cold front or a torrential rainstorm.
When planting your tomatoes directly into the garden soil, maintaining proper spacing is vital for air circulation and disease prevention. Space indeterminate vining varieties 24 to 36 inches apart in rows that are spaced roughly 3 to 4 feet apart, while compact determinate bush varieties can be placed slightly closer at 18 to 24 inches apart.
When you get down into the garden soil, use these best practices:
- Water your transplant pots thoroughly an hour before planting so the root balls slide out easily
- Dig your planting holes deep enough to bury a portion of the main stem
- Remove the lower sets of leaves from the plant
- Place the root ball into the hole and cover the lower stem with soil, as Minnesota Extension recommends, to encourage the development of a massive secondary root system all along the buried stalk
- Firm the soil gently around the base and water deeply to settle the roots
- Install your stakes, wire cages, or trellises immediately at planting time while the root system is still compact and undisturbed
What I Do To Keep Tomato Plants Healthy And Productive
Maintaining a productive tomato patch over a long season requires consistent habits and expert structural management rather than emergency fixes. In my own garden, I rely on a few foundational routines that keep my vines thriving from June through the autumn frosts.
To force my indeterminate tomato plants to branch out and produce multiple fruiting colas rather than just a single tall whip, I pinch out the growing tip of the main stem once the plant establishes strong side shoots, or I selectively top young indeterminate vines to encourage bushier multi-branched architecture. For indeterminate varieties, I actively manage the side shoots, known as suckers, pinching out the smaller ones that emerge in the V-joints between the main stem and branches to maximize airflow and direct plant energy toward heavy fruit production.
When the summer heat sets in, I manage dry periods by providing deep, infrequent watering rather than splashing the plants with a shallow drink every single day. Deep watering encourages roots to chase moisture downward into the earth, making the plant significantly more drought-resistant. I always water the base of the plant directly using a drip hose or watering wand, keeping the foliage as dry as possible to discourage fungal spores like early blight.
To keep the soil environment stable, I keep the ground heavily mulched with clean straw or shredded leaves. Mulch suppresses weeds, prevents soil from splashing up onto the lower leaves during heavy rains, and locks in vital soil moisture.
When it comes to nutrition, I mix organic compost into the planting holes and side-dress the plants with a balanced, slow-release organic fertilizer once fruit set begins. Superior fruit quality comes down to a simple combination: steady moisture, rich organic soil, full sun, proper pruning, and good air circulation.
When To Expect Your First Tomatoes
Every gardener wants to know exactly when they will harvest their first ripe fruit, but the timeline varies considerably based on your local weather, the specific variety you planted, and your transplant date.
Early-season dwarf varieties might produce ripe fruit in just 55 to 60 days after transplanting, while large heirloom beefsteaks can take 80 to 90 days or more.
Track your progress by watching the transformation unfold across distinct stages:
- The plant recovers from transplant shock and puts out lush new green growth
- Yellow blossoms appear in clusters along the stems, relying on gentle morning breezes or bee activity for pollination
- Small green fruit sets behind each fading blossom and swells rapidly over a couple of weeks
- The fruit transitions from a glossy dark green to a pale breaker stage before ripening to its final rich color
The entire point of nailing your indoor seed-starting schedule isn’t just to grow attractive windowsill plants. It is to get your vines established early enough in the spring to harvest a heavy, delicious crop while summer weather is still in your favor.
A Simple Tomato Seed-Starting Schedule
- 6 to 8 weeks before planting: Calculate your local frost date and start your tomato seeds indoors in clean, sterile soilless mix.
- After emergence: Move sprouted seedlings under bright overhead shop lights and maintain even, moderate soil moisture.
- As they develop: Pot up crowded seedlings into individual containers when their root systems fill their initial cells.
- About 1 to 2 weeks before planting: Begin hardening off your plants by gradually introducing them to outdoor wind and sunlight.
- After frost danger has passed: Plant your tomatoes deep in the garden soil maintaining 24 to 36 inches of space between plants once outdoor temperatures and soil warmth align, install your plant supports, and water thoroughly.
- Throughout the growing season: Pinch stems and prune suckers to encourage branching, apply organic mulch, water deeply at the base, and monitor your vines for steady productivity.
Frequently Asked Questions
Can I Start Tomato Seeds Earlier Than 8 Weeks?
Starting seeds too early often leads to overgrown, root-bound plants that struggle to recover once moved outdoors, especially if your indoor lighting setup cannot accommodate massive vines.
Is Six Weeks Long Enough To Grow Tomato Seedlings?
Yes, in many home garden setups with warm indoor temperatures and good lighting, a six-week window produces stout, healthy transplants that adapt to the garden very quickly.
Can I Grow Tomato Seedlings On A Windowsill?
Natural light from a windowsill can work if it faces south and receives uninterrupted sun, but supplemental overhead lighting is far more reliable to prevent leggy, stretched stems.
What If My Tomato Seedlings Become Tall And Leggy?
Leggy seedlings are almost always the result of insufficient light, excessive indoor warmth, overcrowding, or starting the seeds too early in the season.
When Can Tomato Seedlings Go Outside?
Seedlings can move outside permanently only after all danger of frost has passed, nighttime temperatures stay above 50 degrees Fahrenheit, soil reaches 60 degrees, and the plants have completed a full hardening-off process.