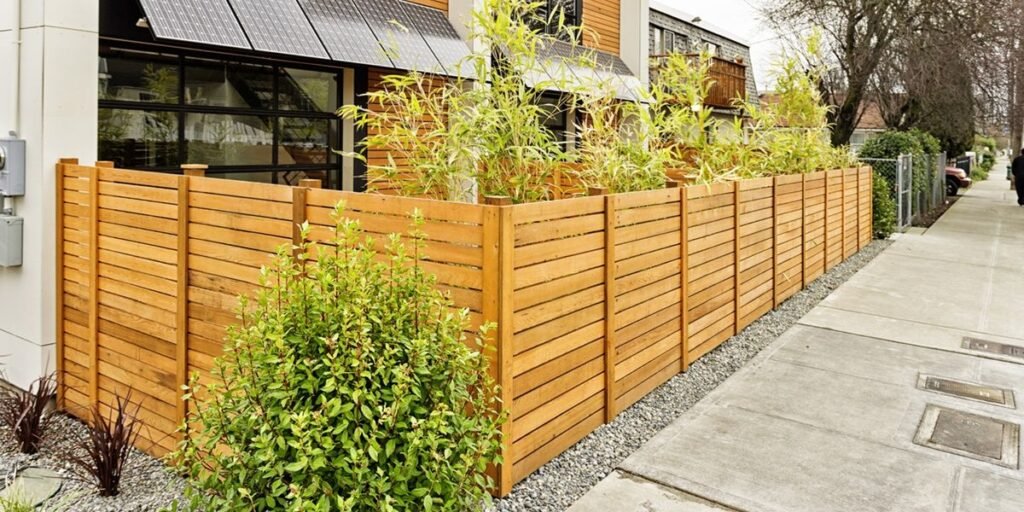
Building a custom wooden planter box is one of the most practical weekend woodworking projects you can undertake. Instead of purchasing flimsy plastic containers or expensive pre-assembled boxes from garden centers, constructing your own allows you to control the exact dimensions, structural strength, and wood quality to suit your outdoor space.
This guide walks you through building a sturdy, raised rectangular planter using accessible, budget-friendly lumber like cedar fence pickets alongside basic dimensional framing wood. You only need standard household power tools to complete the job, and the entire assembly process can easily be completed in a single afternoon.
Choose the Size and Design
The core design featured in this tutorial relies on an internal structural skeleton wrapped in exterior cladding. A standard 36-inch length, 12-inch width, and 12-inch height serves as the optimal starting footprint for most DIY builders. This specific ratio provides sufficient soil capacity without creating an overly heavy structure that becomes impossible to shift once loaded.
Adjusting these dimensions to fit specific spaces requires keeping structural loads in mind. For narrow balcony railings or small apartment porches, reducing the length to 24 inches keeps the unit compact. Conversely, wide outdoor patios or garden walkways can accommodate extended 48-inch runs, provided you add central vertical support posts to prevent the long cedar boards from bowing outward under wet soil pressure.
Scale directly impacts both root health and overall weight. A 36-inch by 12-inch by 12-inch planter holds roughly 2.25 cubic feet of soil. Wet soil weighs approximately 75 to 100 pounds per cubic foot, meaning your finished, fully watered planter will weigh between 170 and 225 pounds. Deciding on the final footprint prior to purchasing materials prevents structural sagging and ensures you do not build a box too heavy for your deck joists.
How Deep Should a Planter Box Be?
Root systems vary drastically depending on what you plan to cultivate, making soil depth a critical choice. Shallow-rooted crops such as leaf lettuce, radishes, spinach, and most culinary herbs like thyme or chives require a minimum soil depth of 6 to 8 inches.
Deep-rooted plants like determinate tomatoes, sweet bell peppers, carrots, and woody perennials require at least 12 to 18 inches of soil depth to develop a strong root base and avoid becoming root-bound during peak summer heat.
Pick the Right Wood and Hardware
Material selection dictates whether your planter lasts two seasons or over a decade in harsh outdoor conditions. Selecting straight, sound boards free from massive loose knots, severe cup warps, or split ends saves hours of frustration during assembly.
Cedar fence pickets measuring 5/8-inch by 5-1/2-inches offer the best balance of affordability and natural rot resistance. While nominal 1-inch rough-sawn cedar boards are thicker, standard pickets cost significantly less per linear foot and perform exceptionally well when backed by an internal frame.
For the internal load-bearing skeleton, use 2×2 lumber cut down from standard 2×4 framing stock or purchased pre-cut. These internal posts give your fasteners something solid to bite into, preventing the thin cedar side boards from tearing free at the corners over time.
Outdoor fasteners must resist corrosion caused by soil moisture and natural wood tannins. Standard interior drywall screws will rust out within months. You need 2-inch exterior deck screws coated with polymer or stainless steel for joining the frame, along with 1-1/4-inch exterior trim screws or 15-gauge stainless steel brad nails to attach the outer cedar cladding.
Incorporate waterproof polyurethane wood glue rated ANSI/HPVA Type I at every structural joint. Standard PVA wood glue breaks down when exposed to rain, whereas Type I exterior adhesives create a bond stronger than the wood fibers themselves.
Applying a clear exterior wood sealant or timber oil is optional. Cedar naturally weathers to a soft silvery-gray patina if left untreated. However, applying a breathability-focused, non-toxic exterior finish helps preserve the natural cedar coloration and reduces surface checking over years of direct sunlight.
Is Cedar a Good Choice for a Planter Box?
Western Red Cedar and Eastern Red Cedar contain high concentrations of naturally occurring organic compounds called thujaplicins. These natural extractive oils give the wood its distinct aromatic scent while actively repelling rot-causing fungi, mold, and wood-boring insects.
Alternative decay-resistant options include Redwood and Cypress, though both carry a much higher price point in most regions. Standard pressure-treated yellow pine is economical and rot-resistant, but older formulations contained chemicals that raised concerns. Modern ACQ pressure-treated lumber is safe for ornamental plants, yet cedar remains the gold standard for organic vegetable and herb gardening due to its complete lack of chemical additives.
Tools and Materials
Before making your initial cuts, gather all required supplies in your workspace. Having your materials organized beforehand keeps your work area safe and ensures precision cut lengths across all matching panels.
Materials
To build a 36-inch long by 12-inch wide by 12-inch tall planter, source the following items:
- 6 cedar fence pickets measuring 5/8-inch by 5-1/2-inches by 6-feet
- 2 framing boards measuring 2-inches by 2-inches by 8-feet
- 1 box of 2-inch coated exterior deck screws
- 1 box of 1-1/4-inch exterior trim screws or brad nails
- 1 bottle of Type I waterproof exterior wood glue
- 1 roll of heavy-duty woven landscape fabric
- 1/2-inch stainless steel or galvanized staples
Tools
Gather these tools before starting construction:
- Miter saw or circular saw
- Cordless drill and driver bits
- Tape measure and marking pencil
- Speed square
- Pocket-hole jig with specialized driver bit
- Staple gun
- Random orbital sander with 80-grit and 120-grit sandpaper
Cut the Frame and Cedar Boards
Measuring correctly and keeping batch cuts uniform guarantees a square box that sits flush on flat ground. Use a sharp, fine-tooth carbide saw blade to avoid tear-out along the fibrous edges of the cedar pickets.
Set up a simple stop block on your miter saw station when cutting repeated elements. Cutting pieces individually using hand-held measurements introduces subtle length variations up to 1/16-inch, which compound during final assembly and create gaps between corner joints.
Once all pieces are cut, run an orbital sander equipped with 120-grit sandpaper across the cut edges to knock down loose splinters and rough manufacturing marks.
Refer to this explicit master cut list for a standard 36-inch length build:
- 4 corner posts: 2×2 lumber cut to 10-1/2 inches
- 4 top and bottom side rails: 2×2 lumber cut to 33 inches
- 4 top and bottom end rails: 2×2 lumber cut to 9 inches
- 6 long side slats: 5/8-inch cedar cut to 36 inches
- 6 short end slats: 5/8-inch cedar cut to 10-1/4 inches
- 3 bottom floor slats: 5/8-inch cedar cut to 34-1/2 inches
Build the Wooden Frame
Assembly begins with the internal skeleton. Constructing this frame first ensures the finished box remains completely rigid, even when holding heavy loads of saturated soil.
Assemble the Top and Bottom Frames
Lay out two 33-inch side rails and two 9-inch end rails on a completely flat work surface to form a simple rectangle.
Drill two pocket holes into both ends of the 9-inch end rails. Apply a liberal bead of waterproof wood glue to the butt joints, press the pieces together, and drive 2-inch pocket hole screws to secure the corners. Repeat this process for the second rectangular frame set.
Check the Frame for Square
Before the wood glue sets up, check your rectangular assembly for proper alignment. Hook a tape measure across opposite diagonal corners, measuring from the outer edge of top-left to bottom-right, then top-right to bottom-left.
If the frame is square, these two diagonal measurements will match precisely. If the numbers differ, gently squeeze the longer diagonal corners together until both measurements align perfectly.
Add the Corner Supports
Position the four 10-1/2-inch vertical 2×2 corner posts inside the bottom rectangular frame so they sit flush with the bottom edge.
Pre-drill clearance holes through the frame into the posts to prevent the wood from splitting. Drive 2-inch exterior deck screws through the outer frame directly into each post, using glue at every contact point. Slip the top rectangular frame over the exposed ends of the posts and secure it using the same method.
Attach the Cedar Sides
With your core structural frame fully assembled and squared, you can now apply the outer cedar skin.
Position your first 36-inch cedar side board at the bottom edge of the long side of the frame. Align the bottom and side edges so the board sits completely flush with the corner posts. Drive 1-1/4-inch exterior trim screws or 15-gauge brad nails through the board directly into the internal 2×2 frame, placing two fasteners at each end.
Repeat this step for the remaining long side boards, stacking them upward toward the top rim. Leave a minimal gap, roughly 1/16-inch or the thickness of a washer, between horizontal boards to allow the cedar room to expand and contract naturally as ambient humidity changes throughout the seasons.
After completing both long sides, attach the 10-1/4-inch short end slats. These end pieces overlap the exposed ends of the long side boards, capping them neatly to create a clean butt joint along the outer corners. Work around all four sides until the skeleton frame is completely enclosed.
Build the Bottom and Add Drainage
Proper drainage design is the single most important factor in preventing root rot and extending the physical lifespan of your planter box wood.
Install the Bottom Supports
Measure 5/8-inch up from the bottom edge of the inside frame to account for the thickness of your floor boards.
Fasten two additional 33-inch 2×2 cleats horizontally along the inside bottom walls using 2-inch deck screws. These interior ledges serve as robust continuous supports that carry the heavy weight of the floor boards and wet soil.
Fit the Bottom Boards
Set your three 34-1/2-inch floor slats horizontally onto the internal support cleats.
Do not push these floor boards tightly against one another. Space them evenly across the bottom, leaving a distinct 1/4-inch to 1/2-inch gap between adjacent slats. These continuous linear gaps allow excess water to escape rapidly after heavy rain events.
Keep the Drainage Open
Never seal or fully close the bottom of a wooden planter. Water must flow freely out of the root zone to prevent soil anaerobic stagnation, which kills beneficial microbes and rots plant roots.
Drill four to six additional 1/2-inch diameter drainage holes through the floor slats using a spade bit or Brad point drill bit. This ensures water continues to drain even if the boards expand and close up slightly when fully saturated.
Line the Planter
Lining the inside of the box protects the raw wood from constant damp soil contact and prevents fine soil particles from washing out through the bottom drainage gaps during heavy watering.
Unroll a sheet of heavy-duty porous landscape fabric and drape it into the empty box. Push the fabric firmly into all interior corners so it fits snugly against the walls, preventing the weight of the soil from tearing the material later.
Secure the fabric along the upper inside rim using a staple gun loaded with 1/2-inch stainless steel staples, placing one staple every 3 to 4 inches.
Use a sharp utility knife to trim away excess fabric 1 inch below the top edge of the box so the liner remains invisible from the outside. The porous landscape fabric allows excess water to pass through freely while keeping the soil mixture completely contained inside the box.
Sand and Finish the Wood
Taking time to prep the exterior surfaces ensures your finished planter looks clean and remains safe to handle without splinters.
Run your random orbital sander over all exterior surfaces using 120-grit sandpaper. Pay extra attention to sharp top corners and outer end joints, rounding them over slightly to soften hard edges.
Thoroughly wipe down the entire box with a dry microfiber cloth or blow it off with compressed air to clear away fine cedar sawdust.
If you prefer a natural weathered look, leave the cedar unfinished. If you choose to apply an exterior stain or food-safe protective oil like pure linseed oil or tung oil, apply it using a natural bristle brush. Allow the finish to cure completely for at least 24 to 48 hours in a well-ventilated space before adding soil.
Fill the Planter and Get It Ready for Plants
Position your completed, empty planter box in its final outdoor location before adding any growing medium. Moving a fully loaded planter risks structural strain and can cause personal injury due to its heavy weight.
Fill the planter with a high-quality, lightweight container potting mix. Standard garden soil from the ground is too dense for container gardening; it compacts tightly, restricts drainage, and deprives plant roots of vital oxygen. Look for a mix containing a blend of peat moss, coconut coir, perlite, and vermiculite.
Fill the container until the soil sits approximately 1 to 2 inches below the top rim. Leaving this headroom prevents soil from washing over the sides whenever you water the plants.
Water the dry potting mix thoroughly until water drips freely from the bottom drainage holes. The soil level will settle slightly during this initial soaking; add additional potting mix as needed to maintain the target height before setting your plants.
What Should Go in the Bottom of a Planter Box?
A persistent gardening myth suggests filling the bottom third of deep planter boxes with gravel, crushed aluminum cans, or foam packing peanuts to improve drainage.
Modern horticultural science disproves this practice. Placing a coarse layer of gravel beneath fine potting soil creates a perched water table. Physics forces water to hold inside the finer soil layer directly above the gravel until that soil becomes completely saturated, effectively reducing root space and causing waterlogging.
Fill the planter entirely with a uniform container potting mix from top to bottom. The engineered bottom gaps and porous landscape fabric provide all the drainage performance your plants require.
Choose Plants That Fit the Box
Match your plant selections to the total soil depth and sun exposure of your chosen setup location.
- Shallow boxes (6-8 inches deep): Excellent for basil, cilantro, parsley, leaf lettuce, radishes, and strawberries.
- Medium to deep boxes (12+ inches deep): Ideal for bush tomatoes, bell peppers, dwarf eggplants, zucchini, and perennial flowering plants like marigolds or salvia.
Group plants with identical water and sunlight requirements together in the same box to simplify your daily care routine.
Keep the Planter in Good Shape
Minimal routine maintenance keeps your handcrafted wooden planter functional for years.
Inspect the bottom drainage openings twice a season to ensure stray roots or compacted debris have not clogged the landscape fabric. Elevate the planter slightly off the ground or patio surface using 1/2-inch rubber feet or wood risers to prevent moisture from trapping under the base.
Periodically check exterior screws and corner joints to verify they remain tight under changing seasonal temperatures. Reapply a light coat of food-safe exterior wood oil once every year if you wish to retain the rich original color of the cedar.
Common Questions About Wooden Planter Boxes
What is the best wood for a planter box?
Western Red Cedar is widely considered the best overall wood species for constructing outdoor planter boxes due to its accessibility, natural decay resistance, and stability. Redwood offers similar rot resistance but typically costs more, while Cypress serves as a regional alternative in the southern United States.
How deep should a wooden planter box be?
A general-purpose planter box should be at least 10 to 12 inches deep. This depth accommodates the root systems of most culinary herbs, leafy greens, root vegetables, and annual flowers. Deep-rooted crops like large tomato varieties require depths of 18 inches or more.
Do planter boxes need drainage holes?
Yes, functional drainage holes are mandatory. Without adequate bottom drainage, excess rainfall or routine watering will pool at the base of the box, souring the soil and causing fatal root rot in almost all plant species within days.
Should I line a wooden planter box?
Lining your planter box with porous landscape fabric is highly recommended. It prevents potting soil from washing out through bottom gaps while allowing water to drain freely. Avoid using solid non-porous plastic sheeting unless it is heavily perforated, as unvented plastic traps standing water against the wood.
Is cedar safe for growing vegetables and herbs?
Yes, cedar is entirely safe for edible crops. Unlike chemical treatments used in industrial lumber, cedar’s natural rot resistance comes from organic oils within the wood. These oils are harmless to soil biology, plants, and humans.