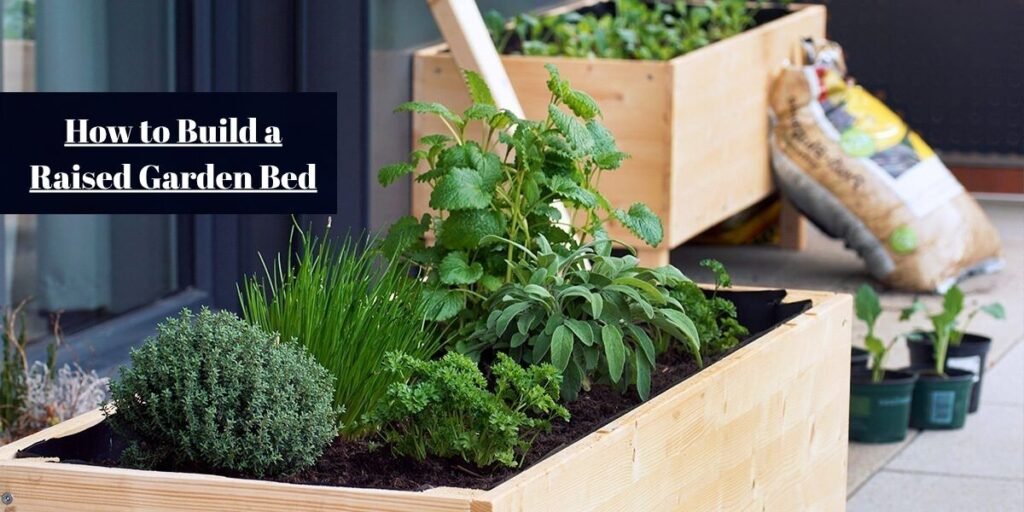
Building a raised garden bed often starts with a deceptively simple picture in the mind of a homeowner looking at an empty patch of backyard turf. The plan looks straightforward on paper: buy a few dimensional boards, drive some screws into the corners, dump in bags of dirt from the local home improvement store, and drop in a handful of tomato starters.
The reality of backyard horticulture quickly introduces a different set of constraints. The wooden box itself is the easiest part of the entire project, requiring very little carpentry skill. The long-term success of the installation depends entirely on factors that have nothing to do with power tools.
Location, structural dimensions, subsurface drainage, soil composition, and physical accessibility determine whether that wooden frame becomes a thriving food source or an expensive, weed-choked container. Skipping these structural fundamentals leads to frustration by mid-season.
Establishing a reliable baseline helps prevent common planning mistakes. The recommended first build is a simple rectangular wooden frame.
- Keep the width at 4 feet so you can easily reach the middle from either side.
- Size the length based on your available yard footprint, with 6 feet or 8 feet being standard choices.
- Target a depth of 10 to 12 inches for a general vegetable-producing environment.
- Position the frame directly over suitable native ground where possible.
- Fill the interior with a balanced, high-performing growing medium.
One dimension does not fit every crop. Depth requirements change depending on the specific vegetables you intend to cultivate.
University of Maryland extension guidance recommends deeper root zones for heavy producers such as tomatoes, peppers, and squash. This is particularly vital when beds sit directly on top of concrete slabs, patios, or heavily compacted hardpan surfaces where roots cannot penetrate downward.
Pick the right spot before buying lumber
Selecting the exact patch of earth for your garden frame deserves careful evaluation before you spend money on building materials.
Several environmental factors dictate whether your crops will thrive:
- Sunlight exposure
- Subsurface and surface drainage
- Ground levelness
- Proximity to an outdoor water spigot or garden hose
- Physical access pathways from all sides
- Safe distance from aggressive shade trees
Vegetables require robust energy conversion, making sunlight a practical constraint rather than a casual preference. Current agricultural guidance recommends a completely open, sunny location. Recent regional guidance from Southern Living highlights that many productive vegetable varieties need 6 to 8 hours of direct, unfiltered sun daily to set fruit properly.
A common oversight involves building the entire structure in a visually appealing corner of the yard, only to discover that you cannot comfortably reach the back side without trampling the soil. Compacting the growing medium chokes out root systems and ruins soil aeration. Assess your physical reach before locking in the layout.
Decide how big the bed should be
Understanding why 4 feet wide serves as the universal standard prevents major ergonomic headaches later. Keeping the width at 4 feet ensures you can comfortably reach the dead center from either perimeter edge without stepping inside the growing medium. Royal Horticultural Society guidance similarly advises keeping garden beds under 5 feet wide to maintain clear physical accessibility.
Choosing your overall bed length requires matching the frame to your personal space and physical stamina.
- A 4 by 8-foot footprint yields maximum growing volume, but it represents a massive physical undertaking for a first-time gardener.
- A 4 by 6-foot frame provides generous yields while reducing soil acquisition costs and construction effort.
- A 3 by 6-foot layout offers even tighter ergonomics for gardeners managing restricted yard dimensions.
Bed height dictates material costs and ergonomic comfort. A single course of standard lumber gives roughly 5.5 inches of actual wall height. Iowa State University notes that typical raised beds range from 6 inches to 20 inches or more, with an approximate height of 11 inches being standard when stacking two common 2×6 boards.
Deeper configurations make agronomic sense under specific conditions:
- Growing deep-rooted crops like carrots or parsnips
- Mitigating severely contaminated or rocky native ground
- Constructing beds on top of paved surfaces
- Eliminating deep bending for gardeners with physical limitations
The primary tradeoff involves volume economics. Doubling the wall height doubles the cubic volume of soil required to fill the structure, driving up material expenses significantly.
Choose the material without overcomplicating it
Wood stands out as the most practical and forgiving construction material for a beginner project.
Evaluating lumber choices requires balancing longevity against upfront expenses:
- Cedar provides exceptional natural decay resistance but commands a premium retail price.
- Redwood matches cedar durability but features limited regional availability and higher costs.
- Untreated softwood like structural pine or fir offers low initial cost but breaks down within a few seasons.
- Pressure-treated lumber treated with modern micronized copper azole formulations resists rot for years while remaining structurally sound.
- Composite boards provide long-term decay resistance but carry high material costs and can flex under heavy internal soil pressure.
University of Maryland extension publications list untreated SPF lumber as an inexpensive short-term option while identifying naturally decay-resistant timbers and modern treated products.
Avoiding hazardous materials is critical. Never use old painted boards of unknown origin, discarded railroad ties soaked in creosote, or utility timber treated with unknown chemical preservatives. Sourcing clean, certified lumber protects your edible crops from absorbing heavy metals or toxic compounds.
What you need for the project
Gathering your tools and supplies beforehand streamlines the build day.
For a standard 4 by 8-foot single-tier frame, assemble the following materials:
- Dimensional lumber matching your chosen thickness and height
- Exterior-rated structural deck screws suited for your wood type
- Corner brackets or internal support stakes if needed
- Galvanized hardware cloth for underground pest exclusion
- High-grade topsoil, compost, and organic amendments
Essential tools include:
- Heavy-duty tape measure
- Carpenter pencil
- Hand saw or circular saw
- Power drill and driver bits
- Drill bits for drilling clean pilot holes
- Spirit level
- Framing square
- Work gloves
- Sturdy garden shovel
If you lack a power saw, ask the retail lumber yard to make your straight cuts at the cutting station. A beginner does not need an entire woodworking workshop to assemble a functional garden bed.
Build the frame
Transforming raw lumber into a rigid planting box requires careful layout and precise fastening.
Begin by marking your exact footprint on the ground using stakes, mason string, and a tape measure. Measure diagonally from corner to corner in an X shape; when both diagonal measurements match down to the fraction of an inch, your footprint is perfectly square.
Clear the ground inside your marked perimeter by scraping away heavy turf grass, perennial weed roots, and major high spots. Do not over-excavate or dig out a massive pit; beds function best when built directly on top of slightly leveled native earth.
Cut your side boards to exact matching lengths, remembering to account for board thickness when butt-jointing corners. Pre-drill screw pilot holes near the ends of the boards to prevent the timber from splitting under pressure.
Assemble your primary rectangle on a flat surface using exterior deck screws driven through the outer walls into the end grain of adjoining boards. Check your frame diagonals with a framing square before driving the final fasteners.
If you are stacking multiple courses to achieve a deeper wall height, stagger your vertical corner joints and install internal 2×4 corner support posts. The Royal Horticultural Society recommends overlapping structural joints between stacked layers to maximize rigidity against outward soil loads.
Set the completed frame onto your cleared patch of ground and place a spirit level across the top edges in multiple directions. Shimming low corners prevents structural twisting once the box absorbs thousands of pounds of heavy, wet growing medium.
Don’t automatically put a solid bottom in the bed
Building directly on open earth eliminates the need for a solid wooden floor. The primary objective is to create a contained growing environment while allowing excess rainwater to percolate downward into the water table.
Placing beds on hard surfaces like concrete patios, asphalt driveways, or wooden decks changes the engineering requirements entirely. The Royal Horticultural Society advises installing adequate drainage pathways and protective liners when constructing raised beds on sealed hardscapes to prevent localized flooding and wood rot.
If burrowing rodents like gophers or voles present a local hazard, staple heavy-duty galvanized hardware cloth to the bottom of the open frame before positioning it on the ground. Avoid the outdated recommendation of placing thick layers of coarse gravel at the bottom of standard beds; scientific extension data shows that perched water tables form above coarse stone layers, actually impairing natural drainage rather than helping it.
Fill the bed with the right growing medium
Filling a newly constructed frame with raw dirt scooped straight from the backyard lawn represents the most common beginner pitfall. Native earth often packs down into a dense, concrete-like mass inside a restricted wooden frame.
Understanding soil components ensures proper root development:
- Native topsoil provides mineral structure and foundational weight.
- Compost acts as the biological engine, supplying slow-release nutrients and microbial life.
- Soilless potting mix or organic peat/coir blends maintain light structural aeration.
Extension recommendations favor balanced blends. The University of Maryland and University of Minnesota Extension outline balanced ratios utilizing equal parts organic compost and screened topsoil, or structured mixes containing 50 to 60 percent topsoil combined with 30 to 40 percent compost and a small percentage of aeration amendments.
Tailor your soil density to your bed depth. Shallow boxes require moisture-retentive, nutrient-dense organic blends, while deep beds benefit from cost-effective bulk topsoil foundations capped with rich, compost-heavy surface layers.
Calculate how much soil you actually need
Buying growing media without calculating volume leads to severe budget overruns or multiple emergency trips to the garden center.
Calculate total volume using standard dimensional math:
Length×Width×Depth=Cubic Feet
For a standard 4 by 8-foot bed built 1 foot deep:
4×8×1=32 cubic feet
Mississippi State Extension confirms that a standard 32 cubic foot requirement translates directly to 1.19 cubic yards of material. Converting that figure into bagged product requires checking bag volumes. Standard home improvement center bags hold either 1.5 cubic feet or 2.0 cubic feet of soil mix. Dividing 32 cubic feet by a 2.0 cubic foot bag size indicates you will need approximately 16 individual bags to fill the frame completely. Bulk delivery becomes more economical once your project volume exceeds 1.5 to 2 cubic yards.
What should go in the first bed?
Selecting your initial round of crops determines your early success and confidence. Choosing plants based on realistic environmental conditions prevents mid-summer crop failure.
Evaluate your layout using clear planting criteria:
- Daily sunlight availability in your chosen yard zone
- Actual internal depth of your constructed growing medium
- Available surface square footage
- Local frost dates and length of your growing season
- Dietary preferences of your household
Beginner-friendly crops establish quickly with minimal pest pressure:
- Leafy greens like lettuce and spinach
- Fast-maturing root crops like radishes
- Crisp bush beans
- Adaptable culinary herbs like basil and parsley
- Compact kale varieties
- Indeterminate tomatoes, provided you install sturdy structural cages or trellises
Tomatoes and vining squashes consume massive amounts of vertical space and soil nutrients, often crowding out smaller crops if planted without adequate spacing.
Plan the planting before you put anything in the soil
Planting without a spatial plan leads to overcrowding and sunlight competition. Dividing a 4 by 8-foot frame into rigid, single-file crop rows wastes valuable surface area.
Successful layout design accounts for multi-dimensional factors:
- Mature plant height to prevent shadowing smaller species
- Optimal sun exposure angles across different daytime hours
- Vertical trellising requirements for heavy climbers
- Root zone spacing requirements to prevent nutrient lock
- Succession planting windows for continuous seasonal harvests
Placing tall trellised cucumbers along the northern edge of the bed prevents them from blocking morning light from reaching sun-loving greens planted on the southern side. Thinking in three dimensions maximizes every square inch of your newly built enclosure.
Watering a raised bed is different from watering the ground
Raised frames offer superior drainage, but that structural advantage creates a secondary challenge: they dry out much faster than inground garden beds. University of Minnesota Extension warns that elevated beds dry out rapidly during high summer temperatures because plant roots cannot tap into deep subsoil moisture reserves.
Manage moisture effectively using field-tested techniques:
- Check actual root-zone soil moisture with your finger rather than watering on a rigid calendar schedule.
- Water deeply and infrequently to encourage roots to dive downward.
- Avoid constant surface dampness that invites fungal pathogens.
- Water during early morning hours to minimize evaporation losses.
- Install low-pressure soaker hoses or drip emitters for efficient delivery.
- Apply a 2 to 3-inch layer of organic mulch to insulate the soil surface against intense solar evaporation.
Freshly filled beds require close attention during their first two weeks as settling occurs and root systems establish their distribution patterns.
Give the bed a little time to settle
Freshly dumped and mixed growing media contains pockets of air and loose organic matter that shift dramatically under the first heavy watering.
The Royal Horticultural Society recommends filling the frame slightly below the top rim, thoroughly soaking the mix down to the base, and allowing the contents to rest for a few days before planting.
Skipping this settling window leads to frustrating structural flaws. If you fill the bed flush to the brim, plant your crops immediately, and hit the box with a heavy garden hose, the soil level can drop by 2 to 3 inches overnight as trapped air escapes. Starting slightly lower or topping off the settled volume prevents exposed root crowns later.
The first few weeks are when beginners learn the most
The initial month following construction serves as an active feedback loop between your design choices and natural plant biology.
Monitoring specific indicators helps you catch minor issues before they become major problems:
- Soil drying out too fast: Increase your watering duration and apply additional organic mulch to the surface.
- Plants wilting despite wet soil: Investigate underlying root rot or severe drainage blockages instead of adding more water.
- Soil level sinking: Top off low spots with fresh, nutrient-rich compost.
- Wooden boards bowing outward: Install heavy-duty mid-span steel braces or internal tie rods to stabilize the frame walls.
- Unexpected weed emergence: Pull unwanted seedlings immediately while keeping track of whether they arrived via windblown seeds or contaminated compost.
- Crops showing overcrowding: Thin dense clusters early before interlocking root systems sustain permanent damage.
Observing these physical signs transforms a first-time builder into an experienced gardener.
How to keep the raised bed productive year after year
Maintaining long-term soil fertility requires consistent, low-effort seasonal maintenance routines.
Keep your installation productive by following these sustainable practices:
- Top dress the bed surface with 2 to 3 inches of finished compost every spring to replenish depleted organic matter.
- Replace any soil lost to natural settling or harvest washouts.
- Refresh surface mulch layers annually to suppress weed germination.
- Clear out diseased plant debris at the end of autumn to break pest life cycles.
- Rotate family crop placements yearly to prevent soil-borne pathogen buildup.
- Inspect corner screws, brackets, and timber conditions annually for early signs of decay.
- Keep surrounding walking paths weed-free and well-mulched to prevent soil compaction near the bed edges.
Maintaining clean perimeter pathways ensures you never step onto your growing media, preserving the loose, aerated soil structure that made the raised bed successful in the first place.
What I would do differently on a first raised bed
Building a garden box for the first time reveals several practical lessons that standard tutorials often omit.
Reviewing these real-world adjustments saves time and money:
- Avoid building the frame wider than 4 feet, as reaching across wider spans strains the lower back.
- Never locate the bed far away from an active water hose spigot, as hauling heavy watering cans gets old quickly.
- Always observe sunlight patterns across your yard for a full weekend before selecting your permanent building site.
- Finalize your exact bed dimensions and calculate soil volume before purchasing expensive dimensional lumber.
- Refuse to fill deep boxes with 100 percent premium bagged potting soil; use bulk topsoil mixes for the bottom layers to control expenses.
- Avoid skimping on soil quality; cheap, clay-heavy dirt ruins the effortless drainage benefits of a raised frame.
- Keep your first installation to a single manageable 4 by 6-foot box rather than tackling a massive multi-bed construction project on your first attempt.
Learning from these practical design tweaks ensures your introductory gardening experience remains rewarding from day one.
A realistic first-bed setup
Starting your first vegetable growing season requires a single, reliable blueprint rather than an overwhelming array of layout choices.
For a dependable, high-yield vegetable bed, construct a 4 by 6-foot or 4 by 8-foot rectangular frame using durable 2×10 or 2×12 lumber. Keep the interior width at 4 feet so both long sides remain completely accessible from the pathways. Build the walls 10 to 12 inches deep to accommodate heavy root systems.
Position the finished frame in a completely open, sunny yard location within easy reach of a water hose. Fill the interior with a balanced blend of 60 percent screened topsoil and 40 percent rich organic compost, leaving a 1-inch margin below the rim for mulch.
Plant approachable crops like leaf lettuce, radishes, bush beans, and cherry tomatoes during your local spring planting window. This proven setup delivers maximum seasonal productivity without overwhelming your schedule.
Frequently Asked Questions
How deep should a raised garden bed be?
Most standard vegetables require a minimum soil depth of 6 to 8 inches, but 10 to 12 inches is ideal for heavy producers and root crops like carrots and potatoes.
What is the best wood for a raised garden bed?
Cedar and redwood offer superior natural decay resistance without chemical treatments, while modern pressure-treated lumber provides long-term structural durability at a lower cost.
Does a raised garden bed need a bottom?
No. Beds built directly over open earth function best without a bottom, allowing natural drainage and beneficial earthworm migration into the root zone.
Should I put cardboard under a raised garden bed?
Yes. Lining the bottom of the frame with plain, unprinted brown cardboard smothers existing grass and weeds while decomposing naturally over time to allow deep root penetration.
Do I need landscape fabric under a raised bed?
Landscape fabric is generally unnecessary when using a thick layer of cardboard and quality soil mix; synthetic fabric often clogs drainage and prevents earthworms from entering the bed.
What soil should I put in a raised garden bed?
The ideal growing medium utilizes a balanced blend of 50 to 60 percent quality topsoil combined with 30 to 40 percent organic compost and a small percentage of aeration material like perlite.
How much soil does a 4×8 raised bed need?
A standard 4 by 8-foot bed built 12 inches deep requires 32 cubic feet (approximately 1.19 cubic yards) of growing medium, which translates to about 16 bags of 2.0 cubic foot soil.
How wide should a raised garden bed be?
Keep garden beds at a maximum width of 4 feet so you can easily reach the center from either perimeter edge without stepping inside the growing area.
Can I build a raised garden bed directly on grass?
Yes. Simply set the wooden frame directly over the turf, line the base with cardboard to smother the grass, and fill the box with your soil mix.
What vegetables grow best in raised beds?
Approachable crops like lettuce, radishes, carrots, bush beans, peppers, herbs, and tomatoes thrive in the loose, nutrient-rich environment of a raised bed.
How often should I water a raised garden bed?
Check the soil moisture daily by hand; raised beds dry out faster than in-ground gardens, typically requiring deep watering every few days depending on summer temperatures and rainfall.
How long does a wooden raised garden bed last?
An untreated softwood bed lasts 3 to 5 years, while beds built from cedar or pressure-treated lumber routinely last 10 to 15 years or more depending on local climate conditions.