Overcrowded kitchen drawers turn a simple five-minute dinner prep into an annoying scavenger hunt. When a spatula jams a shallow drawer shut, measuring spoons disappear under a tangle of whisks, or everyday forks get mixed in with serving pieces used twice a year, simple cooking tasks start to feel like work you never signed up for. After years of working through kitchens of every size and layout, the real problem is rarely a shortage of total space. It is almost always duplicate tools, broken gadgets nobody has thrown away, and essential items stashed in the wrong spot entirely.
Fixing drawer chaos is not about buying a random set of bamboo dividers and hoping for the best. It starts well before that, with a full teardown of every drawer, an honest sort of what is worth keeping, and a layout built around how you genuinely move through your kitchen. Once that groundwork is done, organizers stop acting as a band-aid over clutter and start holding a real storage system in place.
Empty the Drawers and Get Rid of the Clutter
Shuffling utensils from one drawer to another might look like progress, but it just relocates friction to a new spot. Real organizing starts with pulling everything out, every fork, every rubber spatula, every mystery gadget, until the drawer box is completely bare. Spread it all across a clean countertop or dining table. Most people are genuinely surprised by how much they have accumulated once it’s all out in the open.
Before putting anything back, run it through an honest usability check. Warped plastic spatulas, rusted vegetable peelers, cracked measuring cups, and gadgets missing an essential piece belong in the trash. This is also the moment to be blunt about duplicates. Four silicone spatulas that all do the same job, or three vegetable peelers competing for the same three inches of space, are not backup supplies. They are clutter wearing a disguise.
Kitchen drawers also become a landing zone for non-cooking items. Loose batteries, stray hardware, unopened mail, and spare office supplies have a way of drifting onto flat surfaces and settling into whatever drawer happens to be open. Pull all of it out and return it to wherever it actually belongs in the house.
Then there is the category of tools that work perfectly fine but simply never get used. A cherry pitter, an avocado slicer, or a holiday cookie press might feel too good to toss, but if it has not left the drawer in over a year, it is occupying space that your daily tools need more. Donate it, or move it to a secondary storage spot like a top cabinet or a garage bin reserved for once-a-year items.
Clutter settles in because an empty gap existed and nobody stopped it. No organizer can compensate for a drawer that is still overstuffed underneath the dividers. This first pass is the one step people are tempted to skip, and it is the one that determines whether the rest of the project actually holds up over time.
Group Things That Belong Together
With the excess cleared out, the next move is sorting what remains into functional categories, right there on your counter, before anything goes back into a drawer. Forget drawer boundaries for now. The goal is simply to see how much you actually own in each category so you can judge total volume before committing to a final layout.
- Everyday Cutlery: Covers the forks, dinner knives, soup spoons, and teaspoons you reach for at nearly every meal.
- Cooking Utensils: High-heat tools that live near the stove, including turners, tongs, slotted spoons, ladles, and silicone spatulas.
- Food Preparation Tools: Utility pieces that support prep work, such as peelers, microplanes, box graters, garlic presses, and citrus squeezers.
- Measuring Tools: Dry measuring cups, nesting liquid cups, and measuring spoon sets, ideally kept together rather than scattered across multiple drawers.
- Baking Supplies: Specialized items like rolling pins, bench scrapers, pastry brushes, and icing spatulas that serious bakers use often enough to justify their own zone.
- Food Storage Accessories: Bag clips, aluminum foil, parchment paper, plastic wrap, and container lids, all of which tend to sprawl if left unchecked.
- Kitchen Linens: Dish towels, microfiber cloths, oven mitts, and trivets, which need their own clean drawer space rather than getting crammed in wherever there is room.
These groupings should mirror how you actually cook, not an overly precise system that sounds good on paper. Splitting metal spatulas from silicone ones, or separating teaspoons from soup spoons into distant compartments, adds complexity nobody has time for on a busy weeknight. Categories should be broad enough that returning an item takes no thought at all, especially during a rushed cleanup after dinner.
Put Things Where You Naturally Reach for Them
Neat rows inside a drawer mean nothing if the drawer itself is in the wrong place. The real test of a well-organized kitchen is whether the layout supports how you actually move through the room while cooking. Drawer placement should follow the physical sequence of prep, cooking, and cleanup.
Cooking utensils belong in the drawer closest to the range. Keeping turners, wooden spoons, and tongs within arm’s reach of the stovetop saves you from crossing the kitchen mid-sauté, which matters far more than it sounds when something is about to burn.
Prep tools like peelers, chef’s knives, and measuring equipment work best near your main counter workspace, typically the stretch between the sink and the stove where most chopping and mixing happens. Everyday cutlery should sit in a drawer near both the dishwasher and the dining table, which makes unloading dishes and setting the table noticeably faster.
The most accessible drawers at waist height are prime real estate, and they should be reserved exclusively for high-frequency tools. Holiday cookie cutters, turkey basters, and other once-a-year items have no business occupying that space. Move them down to a lower cabinet drawer or a high shelf where they are out of the way but still findable when the season calls for them.
Decide What Should Go in Drawers and What Should Go in Cabinets
Drawers and cabinets are not interchangeable. Drawers give you a full overhead view of shallow contents the moment you pull them open. Cabinets are built for vertical storage and can handle tall, heavy, or bulky items that need open height to sit properly.
Small, flat, or loose tools do best in drawers, since they are the items most likely to get lost on a deep cabinet shelf. Cutlery, hand tools, measuring devices, folded dish towels, and boxed rolls of foil all stay easy to find and grab when arranged in a drawer.
Cabinets are where heavier cookware belongs. Cast-iron skillets, Dutch ovens, and stockpots put real strain on drawer slides unless you are working with heavy-duty, full-extension glides rated for that kind of weight, which most standard kitchen drawers simply are not.
- Drawers Work Best: Cutlery, cooking utensils, prep tools, linens, spices, food wraps, and small baking accessories.
- Cabinets Work Best: Stockpots, mixing bowls, food processors, blenders, cutting boards, and baking sheets.
Baking sheets, muffin tins, and large wooden cutting boards are also worth pulling out of drawers entirely. Stacked horizontally, they force you to lift an entire pile just to reach the item on the bottom. Storing them vertically with cabinet or tray dividers inside a lower base cabinet solves that problem completely and takes up less usable width than most people expect.
Measure the Drawer Before Buying an Organizer
This is the step that trips up more people than any other. Buying storage bins before measuring your drawer’s interior almost always ends in a return trip to the store. Packaging usually lists exterior dimensions, but it is the interior of the drawer that actually determines what fits.
Pull the drawer completely open and take three measurements:
- Interior Width: Measure from the inside edge of the left panel to the inside edge of the right panel, checked at both the front and back of the box since many drawers taper slightly.
- Interior Depth: Measure from the inside surface of the front panel straight back to the rear interior wall.
- Clearance Height: Measure from the drawer floor up to the lowest point of the frame above it, including any lip or overhang at the top.
Clearance height is where most organizing projects go wrong. Many standard top drawers have interior vertical clearances of under three inches, closer to the two-and-a-half-inch range in older cabinetry. A three-inch tall organizer bought without checking this measurement will catch against the cabinet frame and keep the drawer from closing all the way.
It is also worth accounting for hardware that eats into that space, including protruding screw heads, rounded interior corners on molded drawer boxes, or soft-close slide mechanisms that extend slightly into the cavity. Finalize your category groupings first, then measure your exact footprint, and only then start shopping for organizers.
Choose the Right Organizer for Each Drawer
An organizer’s real job is keeping items in place through the dozens of quick open-and-shut motions a drawer goes through every day. The right style depends entirely on the size, weight, and quantity of what is going into that specific drawer.
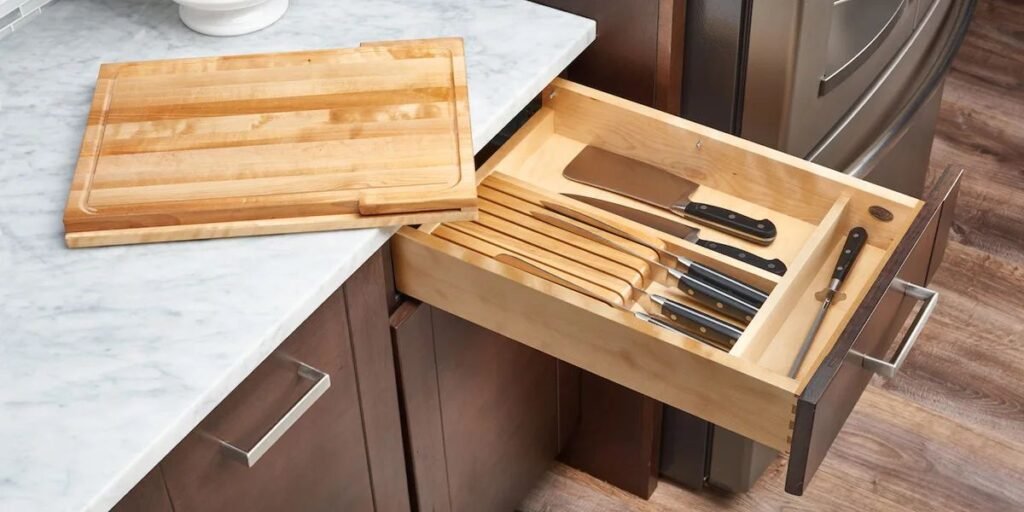
Cutlery trays offer structured, narrow channels built for the uniform sizes of forks, knives, and spoons, making them the obvious choice for a primary silverware drawer.
Adjustable or spring-loaded drop-in dividers are ideal for longer cooking utensils and prep tools. They lock against the front and back walls of the drawer, creating custom-width lanes without stealing vertical clearance or overall volume the way boxed trays can.
Individual modular bins give you the flexibility to mix rectangular and square pieces into a tight grid. This works especially well in drawers holding mismatched prep gear, bag clips, or baking accessories that do not fit neatly into a single tray design.
Expandable organizers have side wings that extend outward to meet the drawer walls, closing off the gaps along the margins where small items tend to slide out of reach. They are a smart pick when your drawer’s width falls between standard tray sizes.
Deep containers or high-walled bins are necessary in base drawers to keep long items like ladles and large whisks from tipping over as the drawer opens and closes. Look for bins with non-slip rubber feet, or add a silicone liner beneath lightweight plastic trays so they stay put during regular use rather than sliding around every time you pull the drawer open.
Steer clear of organizers built with excessively thick walls or rigid, undersized compartments that do not match your actual tools. They waste perimeter space you will wish you had, and they leave you stuck if your tool collection changes down the road.
Organize Deep, Shallow, and Small Drawers Differently
Deep Drawers
Deep base drawers offer plenty of volume, but without structural boundaries they turn into a pit where items pile on top of each other and the ones at the bottom become invisible. The fix is to store items vertically instead of flat.
Tall individual bins, drop-in vertical slot dividers, or peg-style inserts let you stand larger items upright rather than stacking them. Storing lid-fitted containers, nested mixing bowls, or bulkier prep tools this way means every item is visible and reachable the moment you open the drawer, with no digging required.
Shallow Drawers
Shallow drawers, generally those with two to three inches of vertical clearance, are built for a single layer of storage and nothing more. Try to stack items in one of these and the drawer will jam against the cabinet face before it fully closes.
These drawers are best reserved for low-profile items such as standard cutlery, measuring spoons laid flat, vegetable peelers, or neatly folded dish towels. A shallow modular tray or a flat drop-in divider keeps everything sitting in one clean layer without wasted height.
Small or Narrow Drawers
Narrow drawers, typically running eight to twelve inches wide, tend to feel like the hardest ones to figure out. Cramming a fixed multi-compartment tray into that width usually backfires, stripping away clearance and leaving awkward, unusable gaps along the sides.
A better approach is to skip the rigid tray altogether. Line the floor with a high-grip textured liner and lay long tools directly on the surface, or install a single slim divider down the center to create two clean, full-depth channels. Keep these drawers dedicated to one compact category, whether that is spice jars, boxed food wraps, or a basic set of measuring tools.
Give Each Main Drawer a Clear Job
Long-term order depends on every main drawer having one defined role. When a drawer is assigned a single job, cross-contamination between categories stops happening, and putting things away becomes something anyone in the household can do without thinking twice.
Your primary top drawer should be dedicated entirely to everyday cutlery, using a fitted tray that keeps forks, knives, spoons, and teaspoons in their own lanes. Keep this drawer free of utility items or serving pieces so table setup and cleanup stay quick.
Set up a cooking utensil drawer right next to the range, with spatulas, turners, tongs, and wooden spoons arranged in parallel channels using adjustable dividers. Keeping tools in a single layer within their own lanes prevents handles from locking together when a drawer is opened quickly mid-cook.
A food preparation drawer near your main counter workspace should house peelers, garlic presses, citrus reamers, and handheld graters. Modular rectangular bins fitted snugly together work well here, since these tools tend to be odd-shaped and do not stack neatly on their own.
If baking is a regular part of your routine, group measuring spoons, flexible scrapers, dough cutters, and rolling pins into their own dedicated drawer. This keeps baking prep efficient and stops you from digging through general cooking tools every time you need a specific piece of equipment.
If your kitchen has a junk or utility drawer, give it real structure rather than letting it become a dumping ground. Small individual bins can assign explicit spots for essentials like tape, scissors, a notepad, and pens. Once a bin fills up, enforce a simple rule: something has to come out before anything new goes in.
Make Better Use of Cabinet Space
Drawer organization and cabinet organization are closely connected. When cabinets are overstuffed or disorganized, the overflow inevitably spills into your drawers and eats into the storage space you just worked to reclaim.
Vertical sheet-rack dividers inside lower cabinets let you store cutting boards, baking sheets, and cooling racks upright instead of stacked flat. This makes it easy to slide out a single item without disturbing the rest, and it frees your deep drawers for the bulky items that actually belong there.
Pots, pans, and heavier cookware should stay grouped in a deep lower cabinet or a heavy-duty pull-out drawer located near the stovetop. Matching lids can go on a vertical rack mounted to the inside of a cabinet door, or in a dedicated lid organizer positioned right next to the cookware itself.
Avoid burying high-use items behind specialty equipment you rarely touch. Seasonal pieces like holiday platters or a pressure canner should move up to a high top shelf or out to secondary storage entirely, away from your main work zones.
Wire or wooden shelf risers inside tall cabinets effectively double your usable vertical storage. They let you stack bowls, mugs, or canned goods across separate tiers instead of building tall, unstable stacks that are risky to reach into.
Heavy stone bakeware, cast-iron pans, and bulky small appliances belong on low, sturdy cabinet shelves or base-level surfaces. Keeping the heaviest items down low makes them safer to pull out and takes ongoing structural stress off upper cabinetry that is not built to hold that kind of weight indefinitely.
Leave Room for Things to Be Put Away
A well-organized drawer should never be packed to its absolute limit. When a drawer is filled edge to edge, pulling out one tool means shifting three others out of the way first, and putting things back becomes a chore people start avoiding.
A practical rule of thumb is to leave ten to fifteen percent of a drawer’s space open even after everything is organized. That buffer gives your hands room to move, lets you retrieve items without snagging on their neighbors, and leaves space for the occasional new tool without forcing a full reorganization.
That breathing room also keeps drawers gliding smoothly, rather than catching on a tool that is wedged too close to the frame, which matters most during busy cooking sessions when you do not have time to wrestle with a stuck drawer.
Adjust the Layout After You Use It
No system is perfect the moment you finish setting it up, and that is normal. Live with the new arrangement for two to three weeks and pay attention to how it actually holds up against your real cooking and cleaning habits.
If certain tools keep ending up abandoned on the counter after cooking instead of back in their assigned spot, that drawer is probably too inconvenient or too crowded. Move those tools somewhere closer to where you actually use them.
If two categories keep bleeding into each other inside a shared drawer, the dividers you are using are likely too loose or too broad. Add another divider, or narrow the lanes, to reinforce a boundary that is not holding on its own.
When a drawer feels genuinely frustrating to use, or keeps jamming, the root cause is almost always layout, not a lack of space. Revisit your groupings, clear out any clutter that has crept back in, and adjust your bins until the drawer works with your routine instead of against it. A kitchen that is organized well does not just look tidy. It disappears into the background of your cooking, which is really the entire point.