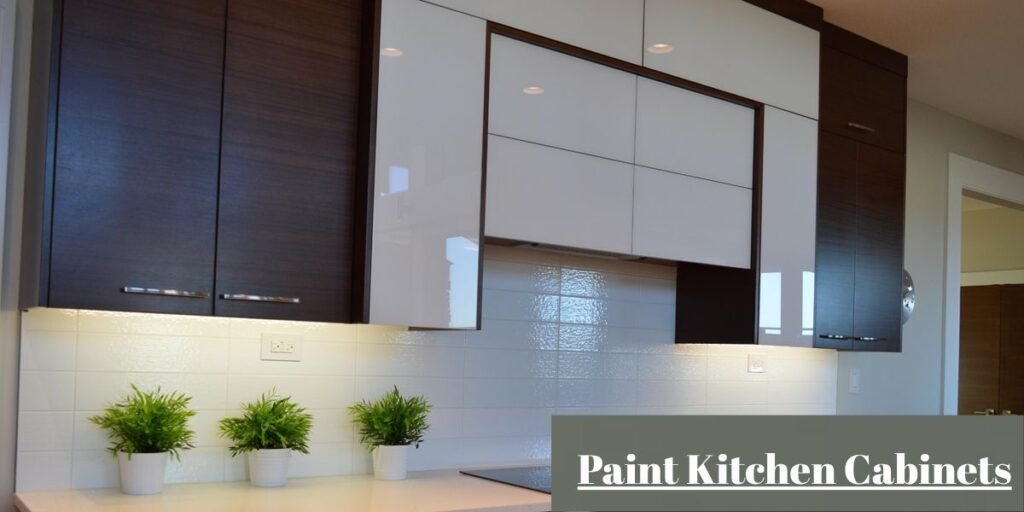
Replacing solid kitchen cabinetry often costs thousands of dollars for simple layout changes that do not improve your functional storage space. A complete cabinet replacement in standard North American kitchens usually runs between 8,000 USD and 25,000 USD when including contractor labor, counter removals, permits, and plumbing work. Painting existing frames and doors delivers a complete visual update for a fraction of that investment, often coming in under 600 USD for high-grade professional supplies.
Achieving a smooth finish requires strict adherence to a multi-stage process. Skipping core preparation steps like degreasing, mechanical dulling, or block priming guarantees surface peeling within months. Success comes from taking time during surface prep, choosing the right self-leveling resin chemistry, applying thin uniform layers, and respecting mandatory cure windows.
Check Your Cabinets Before You Start
Not every cabinet surface accepts paint with the same level of bond strength. Evaluating your baseline substrate determines the specific preparation protocol and dictates whether painting is a viable long-term strategy for your home.
Solid oak, maple, cherry, and pine offer the highest success rates for refinishing. These natural materials absorb primers exceptionally well and provide a structural foundation that holds up against daily impact. Pine and oak require specialized stain-blocking primers due to high concentrations of natural tannins or deep grain pores. Oak features open grain structures that remain visible beneath dried paint unless you apply a dedicated grain filler prior to priming.
Wood veneer cabinets feature a micro-thin layer of real wood bonded over particleboard or plywood core layers. Sanding these surfaces demands extreme precision to prevent burning through the outer wood layer. Inspect all cabinet edges before applying any liquid cleaners. If the veneer shows signs of lifting along the perimeter, glue those loose sections back down using wood adhesive and clamps before proceeding with paint prep.
Medium-Density Fiberboard, commonly called MDF, provides an incredibly smooth surface for paint because it lacks natural wood grain or knots. This engineered material is widely used in custom cabinet doors for its dimensional stability. Unfinished or raw MDF behaves like a sponge when exposed to water-based liquids. You must seal raw MDF edges using an oil-based primer or solvent-borne sealer first to prevent moisture absorption and core swelling.
Cabinets with existing paint require tests to determine the underlying coating chemistry. Rub a cotton ball soaked in denatured alcohol over a hidden section of the frame. If the paint dissolves onto the cotton ball, the original finish is water-based acrylic. If the surface resists the solvent completely, you are dealing with an oil-based alkyd or factory polyurethane finish that requires an aggressive bonding primer.
Gather Your Paint and Tools
Using professional tools saves hours of corrections during the application process. Skimping on cheap applicators or low-grade paints leads to visible brush marks, lint contamination, and premature finish failures.
Standard wall paint lacks the hard resin structure required to withstand hand oils, grease, and mechanical abrasion. Select water-borne alkyd enamels or 100% acrylic urethane enamels designed specifically for trim and cabinetry. Water-borne alkyd formulas provide the leveling and hardness of traditional oil paint while offering low odor, quick dry times, and easy water cleanup. They dry to a durable shell that resists blocking, which means doors won’t stick to frames when closed.
Primer acts as the structural anchor between your bare substrate and topcoat. Use premium stain-blocking shellac primers for raw wood prone to tannin bleed, or heavy-duty adhesion bonding primers for slick surfaces like laminate and cured factory coatings. Never use self-priming paint mixtures for cabinet projects. Cabinet surfaces undergo high stress, making a dedicated primer layer non-negotiable for true factory-level adhesion.
Household soap leaves behind a micro-film that breaks down paint adhesion. Professional painters rely on heavy-duty cleaners like Trisodium Phosphate, commonly known as TSP, or dedicated high-strength degreasers to break down heavy cooking oils and kitchen soot. Wear heavy nitrile gloves and safety eye protection when scrubbing frames with TSP solution. Thoroughly rinse the cleaned surfaces with fresh water afterward to remove all chemical residue.
Stock a variety of sandpaper grit values to cover distinct phases of your preparation work:
- Medium-grit (120 to 150 grit): Use for initial dulling of glossy factory finishes and leveling rough wood filler patches.
- Fine-grit (220 grit): Use between coats of primer and topcoats to drop high spots and remove micro-nib particles.
- Ultra-fine sanding sponges: Use on curved profiles and detailed door moldings where hard sanding blocks cannot conform to the shape.
Select two-part epoxy fillers or high-density wood putties for filling deep gouges and old screw holes. Two-part fillers are set through chemical reaction rather than evaporation, preventing internal shrinkage and cracking over time. Use lightweight acrylic wood fillers only for shallow hairline scratches and minor surface dents across flat panel areas.
Invest in dedicated applicators designed specifically for smooth cabinet finishes:
- 2-inch synthetic angled brush: Features soft polyester-nylon blended bristles for cutting into detail profiles without leaving heavy bristle tracks.
- High-density micro-fiber or foam mini rollers (4-inch width): Apply paint evenly across flat panel areas without creating heavy orange-peel texture.
- Painter’s tape: High-tack blue tape for securing floor paper, combined with low-tack delicate surface tape for protecting wall edges and interior cabinet boxes.
- Canvas drop cloths: Protect floor coverings far better than plastic sheets, which trap liquid spills beneath shoes and create slipping hazards.
- Tack cloths and microfiber rags: Remove fine sanding dust particulates without leaving behind fabric lint.
- Cordless drill or hand screwdrivers: Safely remove door hinges, drawer slides, and decorative hardware without stripping screw threads.
- Sawhorses and 2×4 riser boards: Elevate door panels to a comfortable working height off the floor.
- Cabinet door painting cups or Painter’s Pyramids: Prop up drying doors with minimal surface contact to allow edge painting on both sides.
Remove the Doors and Hardware
Leaving cabinet doors attached to frames during paint application yields a messy amateur appearance. Paint bridges the small gaps around hinge plates, leading to cracking, flaking, and binding whenever a door opens or closes. Set up a clean work area equipped with labels and storage containers before turning a single screw.
Number every opening sequentially. Apply a piece of painter’s tape inside the hinge cup of the door and a matching label on the inside of the corresponding cabinet box. Unscrew hardware using hand tools or low-torque settings on cordless drivers to avoid stripping soft cabinet wood. Place hinges, mounting plates, and specific screws into labeled baggies matching your box location numbers. Unscrew decorative drawer fronts from the inner drawer box assembly so you paint only the outer face panel.
Clean the Cabinets Thoroughly
Kitchen cabinets gather invisible films of aerosolized cooking fats, skin oils, and airborne dust over years of daily home use. Paint applied over oily surfaces will fail to bond, leading to bubbling and peeling down the line.
Apply your degreaser solution using abrasive pads, scrubbing repeatedly around door handles and above cooktop zones where grease concentrates. Rinse the cleaned surfaces twice using clean rags damp with fresh water. Allow all wood structures to dry for at least 3 hours before starting mechanical sanding.
Fill Holes and Repair Damaged Areas
Painting highlights surface flaws rather than hiding them. Fixing structural defects, scratches, and unwanted hardware holes before applying primer gives you a clean foundation.
Overfill old screw holes slightly using a two-part resin wood filler to account for minor settling during cure time. Press the filler firmly into damaged areas with a stiff putty knife, feathering the edges thin against the surrounding wood. Allow the patch to cure completely according to the manufacturer’s timeframe. Sand the filled repair flush to the surrounding substrate using 150-grit sandpaper until you can no longer feel the edge line with your fingertips.
Sand the Cabinets
Sanding cabinet surfaces for paint is about creating a microscopic mechanical profile, not stripping the piece down to bare raw wood.
Scuff-sand every square inch of previously painted, stained, or varnished surfaces using 150-grit sandpaper. The goal is to transform the reflective finish into a flat matte surface that gives the primer something to grip. Use flexible sanding sponges to reach into detail profiles, panel grooves, and routed edge profiles without flattening crisp architectural lines.
Dust left behind by sanding mixes directly into wet paint, producing a gritty finish. Vacuum all cabinet frames, doors, and floor surfaces using a soft brush attachment. Next, wipe down all surfaces with a clean microfiber cloth. Finish with a light pass of a tack cloth to grab remaining micro-dust particles.
Prime the Cabinets
Primer seals porous substrates, prevents natural wood resins from bleeding through, and creates a high-adhesion bridge layer for your finish enamel.
Match your primer selection directly to your specific baseline surface needs:
| Substrate Condition | Primer Chemistry Choice | Key Functional Benefit |
| Bare Oak / Pine / Cedar | Shellac-Based Primer | Blocks severe tannin bleed and seals resin knots completely. |
| Laminate / Factory Varnish | Synthetic Adhesion Bonding Primer | Anchors chemically to slick, non-porous synthetic materials. |
| Previously Painted Latex | Water-Borne Acrylic Alkyd Primer | Provides high film build, seals repairs, and sands easily. |
| Raw MDF Core Edges | Oil-Based / Solvent-Borne Primer | Seals porous fiber edges without raising core moisture fibers. |
Apply primer using a systematic method to prevent thick edges and drips. Coat detail grooves first using your angled brush, then immediately roll flat panel surfaces with a short-nap roller. Keep coats thin and uniform, laying paint out in the direction of the underlying wood grain.
Test adhesion strength before priming everything if you are unsure of the existing finish. Prime a small spot inside a cabinet door, let it dry for 24 hours, and scratch it firmly with a thumbnail. If the primer lifts easily, stop and switch to a higher-adhesion bonding primer.
Sand the Primer Smooth
Sanding your primer coat is one of the biggest secrets to getting a smooth finish. Primer often raises loose wood fibers and traps tiny dust particles as it dries.
Once the primer dries completely, sand all surfaces lightly using 220-grit paper or a fine sanding sponge. Apply minimal hand pressure because your only goal is to knock down high spots, brush ridges, and dust nibs. Wipe away all white sanding dust using a dry microfiber cloth and a tack cloth. Feel the surface with your open palm; it should feel as smooth as glass before you open your topcoat paint container.
Paint the Cabinet Frames
Paint the fixed cabinet boxes inside your kitchen before tackling the loose doors in your shop area. Work from the top of the cabinet structures down toward the floor to prevent wet paint from dripping onto finished sections.
Apply topcoat paint into frame corners and wall joints using your 2-inch angled brush. Roll broad vertical stiles and horizontal rails right up to the wet brush marks to blend the textures together. Maintain a wet edge while working. If paint begins to set and feel tacky under your brush, do not brush back over it. Dragging drying paint creates permanent ridges and tears the curing film.
Paint the Doors and Drawer Fronts
Cabinet doors make up most of your visible kitchen surface area, demanding a controlled environment and systematic process.
Position doors horizontally on sawhorses fitted with painter’s pyramids. Horizontal drying allows high-solid enamels to level out naturally before setting, eliminating brush marks. Paint the back sides of the doors first and allow them to dry completely. Flip the doors over onto soft support pads to paint the front faces. If a minor run occurs, it stays hidden on the back of the door rather than the front.
Brush detailed panel moldings first, then immediately roll the flat center panel and outer frame rails. Inspect all four door edges for paint drips before leaving the piece to dry.
Apply the Second Coat
A single heavy coat of paint dries unevenly, traps moisture, and sags along edges. Two thin coats create a stronger, more durable finish. Respect the recoat times listed on your paint container label. Modern water-borne alkyd enamels typically require between 4 hours and 8 hours of dry time between coats, depending on ambient room humidity.
Inspect the first dry coat under bright side lighting. Lightly sand away any dust nibs or brush marks using 220-grit paper, clean off the dust, and apply your second thin topcoat using the exact same brush-and-roll method.
Let the Cabinets Dry Before Reinstalling Them
Understanding the difference between drying and curing prevents ruined finishes during final assembly. Paints become dry to the touch when their water or solvent carrier evaporates, usually within 0 to 8 hours. However, the finish remains soft and vulnerable to pressure marks for days while the resins cross-link and cure into a hard shell.
Wait at least 24 to 48 hours before handling painted doors for reinstallation. Treat the new finish gently for the first 30 days, avoiding harsh chemical cleaners and heavy scrubbing while the paint reaches its full hardness.
Reinstall the Doors and Hardware
Reassembling your kitchen hardware requires patience to avoid scratching your fresh paint job.
Reattach your original hinges to their matching doors using the tags you made during teardown. Screw mounting plates back into the original cabinet frame pilot holes using manual screwdrivers. Hang the doors and adjust their alignment screws until the reveal lines around all doors look straight and even.
Install your knobs and handles carefully. Attach clear silicone bumper pads to the back corners of every door panel to prevent fresh paint surfaces from sticking or clacking against the frames.
Brush, Roller, or Sprayer: Which Should You Use?
Choosing your application equipment comes down to balancing setup time, skill level, and expected finish quality.
Brushes offer precise control and require zero mask-off setup time inside an active home environment. High-quality synthetic angled sash brushes are essential for painting detailed trim and recessed door panel profiles. Brushing everything by hand takes longer and leaves micro-textures behind if you work with fast-drying paints that don’t level out well.
High-density foam or micro-fiber mini rollers offer an ideal middle ground for DIY projects. They apply paint quickly over flat door panels while creating a subtle texture that hides minor surface flaws. Using a roller alongside an angled brush gives you a smooth finish without the extensive prep work required for airless paint sprayers.
HVLP or airless paint sprayers deliver a factory-smooth finish with no brush marks or roller stipple. They apply consistent paint layers across complex, detailed door profiles quickly. Spraying requires significant setup time, including masking off your entire kitchen with plastic sheeting to block overspray. Cleaning and calibrating spraying equipment also requires technical experience to prevent sags and runs.
How to Get a Smooth Finish
Professional results come down to controlling environment variables and mastering basic tool handling:
- Work in a clean environment: Dust ruins wet paint. Vacuum your workspace thoroughly, close windows to block wind, and avoid working directly under forced-air heating vents.
- Avoid overloading tools: Dip only one-third of your brush bristles into the paint, and roll off excess paint in your tray until the roller is damp rather than dripping.
- Never work setting paint: Once self-leveling enamel begins to tack up after a few minutes, leave it alone. Brushing over setting paint tears the leveling film and leaves heavy permanent brush tracks.
- Keep ambient temps moderate: Paint in spaces kept between 60 F (15 C) and 80 F (27 C) with relative humidity below 65 percent for proper film formation.
Fixing Problems With Painted Cabinets
When problems pop up during paint application or drying, step back and address the root cause using these targeted fixes.
Peeling stems from poor cleaning, skipping surface dulling, or using the wrong primer over slick substrates. Scrape away all loose, flaking paint back to a firmly bonded edge. Sand the transition edge smooth using 120-grit paper, clean the area with a degreaser, apply a dedicated bonding primer, and re-apply your finish coats.
Visible brush marks happen when paint dries too quickly, when you work back over setting paint, or when using stiff brushes. Let the finish dry completely for 48 hours. Sand the surface flat using 220-grit paper, thin your topcoat paint slightly with a manufacturer-approved leveling additive, and apply a light coat using a soft synthetic brush.
Runs and sags happen when you apply too much paint at once, especially along routed door edges and recessed corners. Allow the run to dry completely until hard. Use a razor scraper held flat against the surface to slice off the top of the paint drip, sand the area smooth with 220-grit paper, and apply a light coat.
A gritty texture means airborne dust, sanding debris, or dried paint skin settled on the surface while it was wet. Sand the dry surface smooth using 320-grit paper, vacuum the area thoroughly, and wipe it down with a fresh tack cloth. Strain your paint through a mesh filter before applying your final thin coat in a dust-free space.
Sticking happens when you reinstall doors too early or skip silicone bumpers, causing soft paint films to bond together under pressure. Carefully separate the sticking surfaces using a thin putty knife. Sand away damaged paint spots, touch them up, let them cure for several days, and install clear silicone bumpers on all contacting corners.
Stains bleeding through point to using an improper primer over woods rich in tannins, such as oak or knotty pine. Seal the affected area by applying a thin coat of white shellac-based primer directly over the stained spots. Let it dry for 1 hour, then re-apply your finish coat.
How Much Does It Cost to Paint Kitchen Cabinets?
Understanding basic material expenses helps you budget effectively for your cabinet refinishing project.
Taking the DIY route for a medium-sized kitchen with 15 to 20 cabinet doors typically costs between $225 and $375 in total materials. This includes one gallon of high-grade water-borne alkyd enamel (70 USD to 110 USD), one gallon of specialty primer (45 USD to 75 USD), degreasers and rags (20 USD to 35 USD), sandpaper assortments (25 USD to 40 USD), brushes and rollers (35 USD to 60 USD), and protective masking supplies (30 USD to 55 USD).
Hiring a professional painting contractor for that same kitchen usually ranges from $2,200 to $4,800, depending on local labor rates, door detail profiles, and the current condition of your cabinets.
Frequently Asked Questions
Do you have to sand kitchen cabinets before painting?
Yes, scuff-sanding is non-negotiable for lasting paint adhesion. You do not need to strip the cabinets down to bare wood, but you must dull glossy surfaces with 150-grit sandpaper so your primer can grip the substrate mechanically.
What type of paint is best for kitchen cabinets?
Water-borne alkyd enamels and 100% acrylic urethane enamels yield the best results. These formulas deliver the leveling and durability of traditional oil paints while offering low odor, quick dry times, and non-yellowing performance over time.
Do kitchen cabinets need primer?
Yes, applying a dedicated primer coat is essential for success. Primers seal porous raw wood, block tannin stains, and provide a strong bonding bridge over existing glossy finishes that standard topcoat paints cannot match.
Can you paint laminate kitchen cabinets?
Yes, you can paint laminate if you use the right preparation steps. Clean the laminate with a heavy-duty degreaser, dull the surface using 120-grit sandpaper, and apply a specialized bonding primer designed for non-porous synthetic surfaces before painting.
Is a brush or roller better for painting cabinets?
Using both tools together yields the best DIY balance. Use an angled synthetic brush to cut into detailed frame corners and door moldings, then follow up with a high-density foam or micro-fiber mini roller to lay out smooth coats on flat panels.
How many coats of paint should kitchen cabinets have?
Apply one dedicated primer coat followed by two thin topcoats of enamel paint. This multi-layer system provides full color coverage and long-term protection against daily kitchen wear.
How long should painted cabinets dry before reinstalling the doors?
Wait at least 24 to 48 hours before reattaching doors and hardware to your cabinet frames. Treat the new finish gently for the first 30 days while the paint cures completely into a hardened protective shell.
Can you paint kitchen cabinets without removing the doors?
Painting cabinets with the doors attached leads to poor finish results. Paint bridges the small gaps around hinge plates, creating cracking, paint runs along vertical edges, and sticking doors whenever they open or close.
How do you prevent brush marks when painting cabinets?
Prevent brush marks by using soft synthetic brushes, adding a leveling extender to your enamel paint, working in thin coats, and avoiding the urge to re-brush areas that have already begun to dry.