Plaster cracks, heavy orange-peel texture, and dated paneling send most homeowners straight to Pinterest, then straight to a panic once the quotes start rolling in. The real budget killer isn’t the material on the shelf. It is what happens before that material ever touches the wall.
A roll of peel-and-stick vinyl priced at $0.80 a square foot can quietly become the most expensive option in the room once you add skim-coating, specialty primer, or a rented pneumatic nailer for the trim. Meanwhile, a $3.00-per-square-foot MDF panel might go up in an afternoon with almost no prep at all. The real cost of any wall covering lives in the total project, not the sticker price, and that is the lens you should use for everything below.
Every surface tells you what it needs before you even open a catalog. Deep gouges and structural bowing call for something rigid enough to bridge the damage. A smooth but tired drywall surface, on the other hand, is often better served by a thin film or a clever paint trick than by a thick panel it doesn’t actually need. Match the fix to the flaw, and you will spend less while getting a result that lasts.
What to Consider Before Covering a Wall
A material priced at $0.80 per square foot can end up costing more than a $3.00-per-square-foot alternative once it demands extensive skim-coating, specialized primers, or added framing. Homeowners often buy cheap wallpaper twice: once for the roll and once for the plaster repair they didn’t budget for. Walking the wall before walking into a store is the single best money-saving habit in this entire project.
Start by running your hand across the surface and checking for bowing, active moisture, and how deep the damage really goes. Thin or flexible materials telegraph every bump, void, and texture pop underneath them, especially under raking light from a window or a lamp. Rigid panels bridge physical gaps far more forgivingly, while a thick woven textile can visually soften shallow inconsistencies without ever hiding them completely.
- Damage and texture level: Deep gouges, heavy stucco, and cracked plaster genuinely need a rigid board option like MDF or a wood sheet good, unless you are prepared to skim-coat the entire surface first.
- Removability and rental restrictions: Adhesive-backed products can tear the paint and even the paper facing off drywall on removal. Mechanical fasteners or old-fashioned starch-based adhesives are the safer bet for non-permanent setups.
- Moisture and humidity exposure: High-humidity rooms break down standard fiberboard, non-vinyl wallpaper, and raw timber fast. Once swelling or mold sets in, there is rarely a way to fix it without a full tear-out.
- Coverage strategy: A full-wall installation demands precise vertical leveling and trim work from floor to ceiling. Wainscoting height, typically one-third of the wall, cuts material needs dramatically while still protecting the zone that takes daily abuse.
- Tool and skill requirements: Some of these projects need nothing but a utility knife and a steady hand. Others genuinely require a compound miter saw and a pneumatic brad nailer.
15 Inexpensive Wall Covering Ideas
1. Peel-and-Stick Wallpaper
Peel-and-stick wallpaper remains the fastest way to introduce color and pattern without committing to anything permanent. According to industry cost data, DIY peel-and-stick material and supplies typically run $1.00 to $3.00 per square foot, and a basic self-adhesive roll from major home improvement retailers covers roughly 28 square feet for around $24.00.
This material genuinely wants a smooth, primed surface. Vinyl film has tension built into it, and over textured drywall that tension pulls the edges away from the wall over months, leaving air pockets long before your lease is up.
Sub-surface prep decides how long the install actually lasts. Dust, loose paint flecks, or an unsealed patch job all weaken the acrylic adhesive layer, and that is almost always where curling starts along a seam or a corner.
Humidity is the other enemy here. Sustained moisture softens the temporary glue, causing otherwise beautiful installs to sag along the ceiling line in a steamy bathroom within a single season.
2. Board and Batten
Board and batten delivers real architectural depth using some of the cheapest lumber in the yard. Professional wainscoting installation often runs between $7.00 and $20.00 per square foot, but a DIY interior wall built from ripped plywood battens can come in under $1.00 per square foot in materials, since interior panels never have to shed water the way exterior siding does.
The technique relies on vertical strips breaking a flat wall into a structured grid. Paint the underlying wall and the battens the same shade to get the look of custom millwork without a carpenter’s invoice attached to it.
Because the original wall stays visible between the strips, this method hides minor bowing and old patch lines beautifully, though anything inside those grid panels still needs a basic sand-and-fill before you paint.
Installation comes down to accurate spacing and clean chop-saw cuts. Securing every strip into a stud with construction adhesive and brad nails, rather than just drywall anchors, is the difference between a wall feature that lasts decades and one that starts popping loose in a year.
3. Beadboard Paneling
Beadboard’s continuous vertical grooves bring instant cottage charm to lower wall sections. Full beadboard paneling averages $7.00 to $20.00 per square foot, while beadboard-style wainscoting runs closer to $1.00 to $10.00 per square foot. Large 4×8 foot composite sheets keep material costs even lower than individual tongue-and-groove strips.
Sheet beadboard is one of the fastest ways to bury dated plaster lines and minor drywall damage. The rigid backing bridges gaps on its own, and the repeating vertical grooves pull the eye upward, which genuinely makes a room feel taller.
This treatment shines as wainscoting in hallways and dining rooms, exactly the spots that take the most scuffs from furniture and foot traffic. A simple wood chair rail along the top edge finishes the cut line and keeps dust from collecting in the gap.
Standard MDF beadboard swells fast in damp air if it isn’t sealed. Bathrooms and mudrooms genuinely need PVC-based beadboard or a high-grade oil-based topcoat, because MDF and steady moisture are a bad combination that no primer fully solves.
4. Painted Wall Treatments
A great paint job is still the cheapest transformation on this entire list. Interior painting materials typically land between $1.00 and $3.00 per square foot, and specialized applicators or lime-wash finishes rarely push that number much higher, which makes this the most budget-friendly entry here by a wide margin.
Color blocking, geometric stenciling, and lime-wash all lean on light and contrast rather than material thickness to disguise minor surface flaws. A matte, slightly textured lime-wash finish does more to hide old patch marks than most people expect from a can of paint.
That subtle roughness works in your favor for organic techniques like ragging, but sharp geometric color-block lines demand the opposite: a clean, genuinely flat surface, or the tape line will telegraph every dip underneath it.
Getting a crisp edge comes down to technique, not talent:
- Apply high-tack painter’s tape along your measured boundary lines.
- Paint a thin coat of the base wall color directly over the tape edge first.
- Allow it to dry fully to completely seal the tape line against bleed-through.
- Apply your secondary accent color over the sealed edge for perfect separation.
5. Fabric Wall Covering
Starching natural textiles directly onto drywall is one of the oldest tricks in the rental-friendly playbook. Raw cotton, linen, or lightweight canvas mounted with liquid starch generally runs $0.75 to $2.00 per square foot, and the entire installation can be reversed with nothing more than warm water.
This method earns its keep in bedrooms and home offices, where the woven texture genuinely absorbs sound and softens the hard echo that bare drywall creates. Medium-weight fabric bridges hairline cracks and mismatched paint patches reasonably well, though it won’t disguise raised texture or a sharp physical void.
Kitchens and steamy bathrooms are the wrong home for this technique. Trapped grease particulates and moisture break down the starch bond and invite mildew faster than expected.
6. Decorative Wood Paneling
Modern engineered wood paneling has come a long way from dated vintage sheets. Pre-finished panels typically price between $1.80 and $4.50 per square foot, delivering genuine texture without a retro look.
The rigid sheet structure is what makes this option so forgiving. It spans uneven studs and heavily textured plaster without echoing every flaw the way a thin material would.
If you have inherited dark paneling, a shellac-based stain-blocking primer is the fix, not a demolition project. That primer locks in old tannins and dark stains so a fresh color goes on clean, saving an entire tear-out.
Panels need roughly 48 hours to acclimate to a room’s humidity before installation, or you will see buckling at the seams within weeks. Fastening sheets straight into the framing with panel adhesive and finish nails makes the hold permanent.
7. Shiplap or Shiplap-Look Wall Treatment
Shiplap has outgrown its basic reputation. Authentic tongue-and-groove shiplap material runs $2.00 to $7.00 per square foot, but ripping thin 1/4-inch plywood into your own boards can bring material costs down to as little as $0.80 to $1.30 per square foot.
The horizontal lines do real optical work in a tight room by visually stretching the walls outward. Meanwhile, the slight overlap between boards creates shadow gaps that hide uneven drywall texture behind them.
Coin spacers are the trick that makes a DIY plywood version look intentional rather than improvised. They create uniform reveals between boards that mimic true milled shiplap without adding the thickness or cost of the real thing.
Every board still needs to be checked for level individually. Because thin plywood mirrors whatever bow already exists in the framing, long walls sometimes need a low stud shimmed out before the face reads as flat.
8. Cork Wall Tiles
Cork tiles quietly double as a functional pinboard while genuinely dampening sound in a room. Standard glue-down cork tiles cost roughly $3.00 to $7.00 per square foot, with decorative or mosaic cork options running closer to $12.00 per square foot.
Home offices, study nooks, and children’s playrooms are where cork earns its reputation. Its cellular structure absorbs mid-to-high frequency sound reflections, which is genuinely noticeable in rooms with hard flooring and not much soft furniture to soak up echo.
The natural texture of cork masks minor holes and hairline cracks in the wall behind it. However, because the tile itself flexes, any real bump on the substrate should be sanded flat before you glue anything down.
Cork moves with humidity more than expected. Letting tiles sit flat in the room for 72 hours before mounting lets them acclimate and prevents the joints from separating or buckling once they are up.
9. Faux Brick Wall Panels
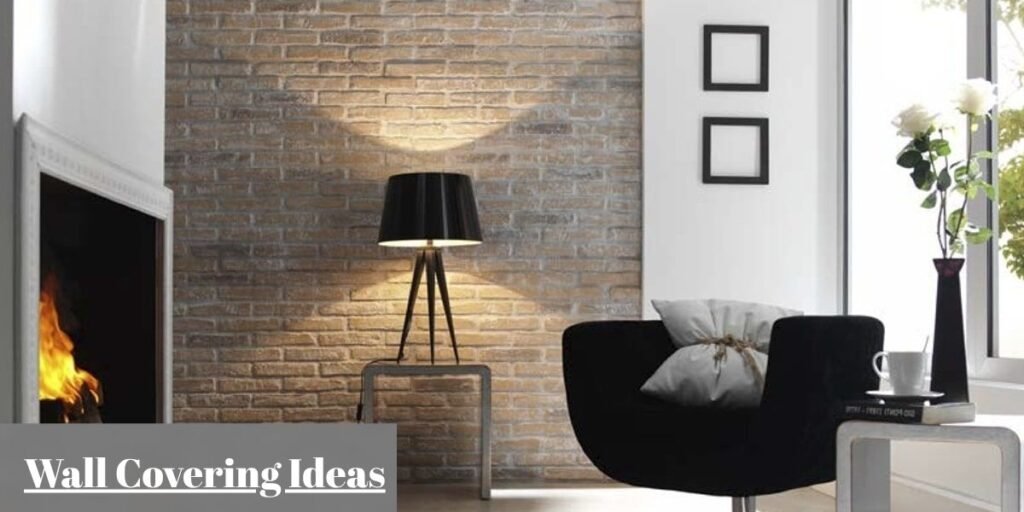
Faux brick has become genuinely convincing, and it costs a fraction of real masonry. Faux brick panels typically price between $8.00 and $12.50 per square foot, while professional DIY installation labor, if hired out, adds another $5.00 to $10.00 per square foot on top of materials.
These molded fiberboard or polyurethane sheets hide serious wall damage without a demolition step. The deep relief pattern creates its own light and shadow, which does most of the work of camouflaging a rough substrate underneath.
Interlocking edge seams let individual sheets read as one continuous wall rather than a series of panels. Filling the joints with matching acrylic caulk and touching them up with paint eliminates the visible break lines between sheets.
A glossy, unpainted factory finish is the single biggest giveaway that a brick wall is faux. A thin wash of joint compound or a matte masonry-tone paint softens that sheen instantly and gets you closer to the look of real, aged brick.
10. Large Wall Hangings or Tapestries
Large tapestries and canvas drop cloths remain the fastest fix for masking damage you don’t want to repair right now. Material costs stay low, generally $0.30 to $1.20 per square foot, and there is no tool list beyond a mounting rail and basic tension hardware.
This is the ideal move for renters and anyone facing a stain, cutout, or failed plaster patch they can’t permanently touch. Heavy natural fibers like wool or canvas also cut down on draft chill along a cold exterior wall, which is a practical benefit most people don’t expect from a decorative fix.
Loose fabric collects dust and shows wrinkles fast if it is hung carelessly. Mounting the top edge to a rigid wood batten and weighting the bottom hem keeps the whole piece flat and taut for years instead of months.
11. Wall Decals and Removable Murals
Large-format vinyl decals and printed murals create a genuine focal point without custom mural-painting prices. Printed vinyl murals typically run $1.20 to $3.50 per square foot, a fraction of the $10.00 to $50.00 per square foot professional mural painters typically charge for custom brushwork.
Nurseries, bedrooms, and single accent spaces are where murals do the most visual work, disguising flat drywall without eating into floor space or altering trim.
Because these thin films cling tightly to whatever they are applied to, they highlight drywall seams and orange-peel texture rather than hiding it. A smooth, primed surface is non-negotiable here.
Trapped air is the most common installation mistake. Squeegeeing outward from the center on a clean, primed wall keeps bubbles from forming and ensures a smooth, professional-looking application.
12. Peel-and-Stick Wall Panels
Three-dimensional peel-and-stick panels, whether in PVC, thin wood veneer, or EVA foam, replicate real dimensional texture at a fraction of the weight. Pricing generally runs $1.50 to $4.00 per square foot depending on the material.
The hollow, molded geometry behind these panels bridges uneven surfaces while casting its own soft shadow lines. This does a surprising amount of work disguising a wall that isn’t perfectly flat.
Lightweight PVC and foam versions cut cleanly with a standard utility knife, which speeds up fitting pieces around outlets and corners. Their water-resistant faces also wipe clean, making them ideal for busy hallways.
The tradeoff is adhesive strength. High-tack backings can tear paper facing straight off drywall during removal. Renters and short-term installers should mount panels to a removable backing board instead of directly onto the wall.
13. Plywood or Simple Wood Plank Walls
Basic construction-grade plywood, pine, or CDX sheeting delivers a handsome industrial finish once you slice it into planks. Material costs drop to roughly $0.60 to $1.40 per square foot this way, among the lowest on this entire list.
Utility plywood stabilizes fragile or crumbling plaster while giving you a solid surface to mount shelving on later, a practical bonus most decorative options don’t offer.
The tradeoff for that low price is labor:
- Slice sheet goods into uniform horizontal or vertical planks.
- Perform a thorough sanding pass, working through 120-grit up to 220-grit.
- Apply a rich gel stain or dark paint to transform the construction grade material.
- Seal both the face and edges with polyurethane or shellac to prevent warping from seasonal humidity.
14. Removable Wall Tiles
Self-adhesive composite and vinyl tiles bring real tile geometry to a wall with zero thinset or grout involved. Removable backsplash tiles generally run $2.00 to $4.50 per square foot, depending on thickness and finish.
Kitchen backsplashes, powder rooms, and compact laundry areas are the natural home for this product, since the protective top coat resists grease splatter and wipes clean without much effort.
Flexible vinyl versions show underlying wall texture more than expected, while rigid aluminum composite tiles span small drywall gaps and shallow gouges far more smoothly.
Adhesive backing breaks down near sustained heat or direct water contact. Keeping tiles at least 6 inches away from an open burner and sealing perimeter edges with clear silicone in damp spots extends their lifespan significantly.
15. A DIY Accent Wall With Paint and Trim
Combining flat paint with applied trim molding creates a custom architectural look for the price of a few pine strips. Basic trim keeps this project between $0.80 and $2.00 per square foot, among the most affordable built-in looks you can achieve.
Diagonal, geometric, or arched trim layouts redirect the eye away from minor surface flaws. Painting the wall and trim the same shade makes the whole thing read as custom millwork rather than an applied afterthought.
Because this method frames sections rather than covering the whole wall, the original drywall stays exposed inside each panel. Any real gouges or flaking paint inside those shapes still need patching and sanding first.
Accurate compound miter cuts are what separate a clean install from a sloppy one on angled trim. Caulking every inner seam with flexible painter’s caulk closes visible gaps and gives the finished wall a crisp, custom appearance.
Choosing a Wall Covering by Room
The right wall covering has as much to do with how a room is used as how it looks. Heat, humidity, and daily scuff hazards should carry real weight in this decision, arguably more than the design itself.
Living Room: Living rooms respond best to focal treatments like board and batten, ripped-plywood shiplap, or custom geometric trim. These architectural details add depth to a large, open wall without interfering with furniture layout or traffic flow.
Bedroom: Bedrooms benefit from softer, quieter finishes like starch-applied linen, full-scale printed murals, or natural cork tiles. All three reduce echo and help create a calmer, more restful atmosphere.
Kitchen: Kitchens need non-porous, wipeable surfaces that can handle grease and heat without flinching. Removable composite tiles, properly sealed beadboard, and scrubbable semi-gloss painted trim hold up well near prep stations or dining nooks.
Bathroom: Bathrooms require strict moisture management. Avoid standard MDF, raw wood, and temporary paper wallpaper entirely, as high humidity swells and peels them quickly. PVC beadboard, rigid composite panels, or dedicated wet-zone tiles are the safest choices here.
Hallway: Hallways take more daily abuse than almost any other space in the house from bags, shoulders, and furniture corners. Beadboard wainscoting or solid wood trim installed up to chair-rail height protects the fragile drywall underneath from ongoing wear.
Home Office: Home offices do best with functional, noise-dampening choices like natural cork, fabric panels, or dark-painted accent trim. Cork doubles as an interactive pinboard, and sound-absorbing fabric walls improve audio clarity on video calls.
Which Inexpensive Wall Covering Should You Choose?
If your primary goal is the lowest possible price, painted treatments, geometric color blocking, and stenciling win outright, as they rarely exceed $1.00 to $3.00 per square foot in materials.
Renters should lean on peel-and-stick wallpaper, starch-mounted fabric, or hanging tapestries, all of which come down cleanly without damaging the underlying wall or risking a security deposit.
For genuinely damaged walls, rigid MDF beadboard sheets, 1/4-inch plywood planks, and faux brick panels do the heaviest lifting, bridging gaps that thinner materials would only emphasize.
If architectural detail is the goal, traditional board and batten, geometric wood trim, and shiplap remain the three treatments most likely to read as custom carpentry rather than a basic DIY project.
For a fast accent feature with minimal tools, printed vinyl murals, large tapestries, and 3D peel-and-stick panels deliver the most visual impact per hour of labor invested.
If you want genuine daily function, natural cork tiles are the clear winner, doubling as a pinboard while absorbing room sound effectively.
For spaces where moisture is a concern, PVC beadboard and aluminum composite tiles are built to resist humidity without swelling, peeling, or promoting mold growth.
Matching the material to what your wall substrate actually needs and preparing the surface properly ensures the finish will far outlast the trend that inspired it.