Managing a household with young children means navigating a constant background hum of activity. A parent might be typing out emails from a makeshift desk setup, boiling water for dinner while keeping one eye on the hallway, or simply trying to make it through the final stretch of the afternoon. In the middle of this domestic routine, kids need a dedicated zone where they can burn energy, explore, and dive into imaginative worlds without turning the living room couch into a jungle gym. A well-designed playroom creates that necessary spatial separation. Yet, the success of that room depends entirely on whether it is built for independent, age-appropriate play rather than just acting as a dumping ground for plastic bins.
A functional playroom is rarely the one packed with the highest volume of toys or the most expensive, magazine-ready aesthetic.
Instead, a properly executed space achieves several practical milestones:
- Gives children ample floor space to move around and build physical confidence.
- Keeps appropriate toys and activities easily accessible at child height.
- Assigns distinct areas for different types of play to prevent chaotic overlapping.
- Makes evening cleanup fast enough that the room gets reset daily.
- Allows parents to supervise younger children without hovering over them constantly.
- Uses durable materials built to withstand everyday family life.
- Adapts smoothly as children grow out of toddlerhood and into elementary school.
The core principle behind any successful playroom remodel is straightforward. The room must work for the child you have right now, while retaining the flexibility to serve that same child years down the road without requiring a total gut renovation.
Before You Remodel, Watch How Your Kids Actually Use the Room
Homeowners often make the mistake of heading straight to furniture showrooms or scrolling through online design catalogs before touching a hammer. That approach usually results in a beautiful space that kids abandon within a week. Before buying a single roll of paint or a single shelving unit, spend a few days observing how your children naturally inhabit the space.
Pay attention to specific behavioral patterns:
- What toys do they gravitate toward on a daily basis versus which ones sit untouched?
- Do they prefer sprawling out on the floor with blocks, or do they sit at elevated surfaces to draw and craft?
- How do siblings interact when they share the room, and do they need physical boundaries to avoid conflicts?
- Where does the household clutter naturally migrate when left unchecked?
- Which items do your kids constantly ask you to reach for them because the storage is too high?
A room designed around actual observed behavior will always outperform a design copied straight from a staged photograph. If your kids spend ninety percent of their playtime building sprawling train tracks on the rug, filling the center of the room with heavy wooden tables will actively work against how they play. Let their habits dictate the blueprint.
Plan the Layout Around How Children Play
Once you understand your kids’ habits, look at the physical architecture of the room.
Evaluate these structural elements before planning furniture placement:
- Room dimensions and overall square footage
- Door swing locations and how they impact usable wall space
- Window placements and natural light angles
- Closet configurations and built-in architectural features
- Electrical outlet heights and locations
- HVAC register positions that might blow air directly onto sitting areas
- Sightlines from adjacent kitchens or living rooms
A common error in medium and small playrooms is over-furnishing the space until the floor area vanishes. The center of the room is often far more valuable for active play than another storage cabinet against the wall.
A reliable layout principle involves pushing permanent or bulky storage elements strictly against the perimeter while preserving open, flexible space right in the middle. Children need a clear circulation path to move between activity zones without constantly bumping into sharp corners or tripping over rugs.
Create Activity Zones Instead of One Room Full of Toys
Children stay engaged much longer when a room supports distinct types of play rather than presenting them with one overwhelming pile of mixed toys. Dividing the space into purposeful zones helps organize both the physical room and the child’s attention.
The Open-Play Zone
This area is dedicated to gross motor movement, building blocks, toy cars, and floor puzzles. It requires uninterrupted flooring and maximum open space where kids can sprawl out and leave construction projects unfinished without getting stepped on.
The Creative Zone
Set this up for drawing, painting, and hands-on crafts. It requires a child-sized table with a washable surface, easy-to-clean flooring underneath, dedicated storage for art supplies within arm’s reach, and strong task lighting to protect developing eyes.
The Reading and Quiet Zone
Every playroom benefits from a calm corner dedicated to books, quiet puzzles, and decompression. This space calls for comfortable seating like floor cushions or a small beanbag, accessible low bookshelves, softer ambient lighting, and minimized visual clutter to encourage focus.
The Pretend-Play Zone
Depending on your child’s current interests, this area can house a play kitchen, dress-up racks, a dollhouse, or puppet theaters. These setups do not require permanent built-in structures. Using flexible, modular storage allows this zone to morph as interests shift from toddler kitchen sets to elementary school hobby supplies.
The Older-Child Zone
To ensure the room grows with your family, leave a transitional corner open for future homework sessions, board game marathons, and independent hobbies. This forward-thinking layout guarantees the space remains functional as your kids age out of traditional toy play.
Design the Room So Kids Can Actually Use It Without You
A truly functional playroom supports age-appropriate independence rather than turning parents into full-time personal assistants. For younger children, independence looks like low open shelving, easy-to-pull fabric bins, and book rails where the front covers face outward so pre-readers can pick their own stories.
As children grow into school age, that storage infrastructure shifts upward and adapts to hold binders, craft kits, and complex board games. However, a crucial distinction exists in storage planning: accessible does not mean everything should be accessible.
Items that require adult supervision—such as sharp crafting scissors, permanent markers, messy sensory materials, or small choking hazards shared with older siblings—must remain in parent-controlled zones higher up on the wall or inside locked cabinets. The primary goal is to empower children to retrieve appropriate items and return them independently, cutting down on the constant interruptions that drain a parent’s afternoon.
Get the Storage Right Before You Buy More Toys
Storage is the backbone of any successful playroom remodel. The most common mistake is asking the wrong question: How much storage can I possibly fit in this room?
The correct question to ask is: What actually needs to be stored, who needs to reach it, and how frequently will it be used?
- Low open shelving: Ideal for frequently used toys, books, and puzzles because toddlers and young children can visually scan their options and pull items out without dumping entire bins.
- Bins and baskets: Best for corralling loose parts like building blocks, small animal figures, and dress-up accessories. Use picture labels for younger kids and word labels as they learn to read.
- Closed cabinets: Perfect for hiding visual clutter, board game boxes with missing lids, and bulk supplies that do not need to be on daily display.
- Built-in storage: Excellent for maximizing awkward architectural walls, under-stair nooks, or long blank runs, provided they do not swallow up all the room’s flexible floor space.
- Closet conversions: Utilize existing bedroom closets by removing hanging rods and installing adjustable shelving systems at varying heights to accommodate changing toy sizes.
When arranging storage, remember a critical safety standard: heavy objects must always be kept low to prevent tipping. The Consumer Product Safety Commission explicitly recommends anchoring all tall furniture such as bookcases, cubbies, and dressers directly to wall studs, and placing heavy items on the bottom shelves to lower the center of gravity.
Choose Flooring for Real Childhood, Not a Showroom
Playroom flooring takes an intense beating. It needs to handle dropped wooden toys, spilled juice, ground-in craft glue, heavy foot traffic, and hours of direct floor play.
- Carpet: Offers unmatched comfort for sitting on the floor and cushions accidental tumbles. However, it requires frequent deep cleaning, traps allergens, and can hold onto moisture or stubborn stains if liquids spill unnoticed.
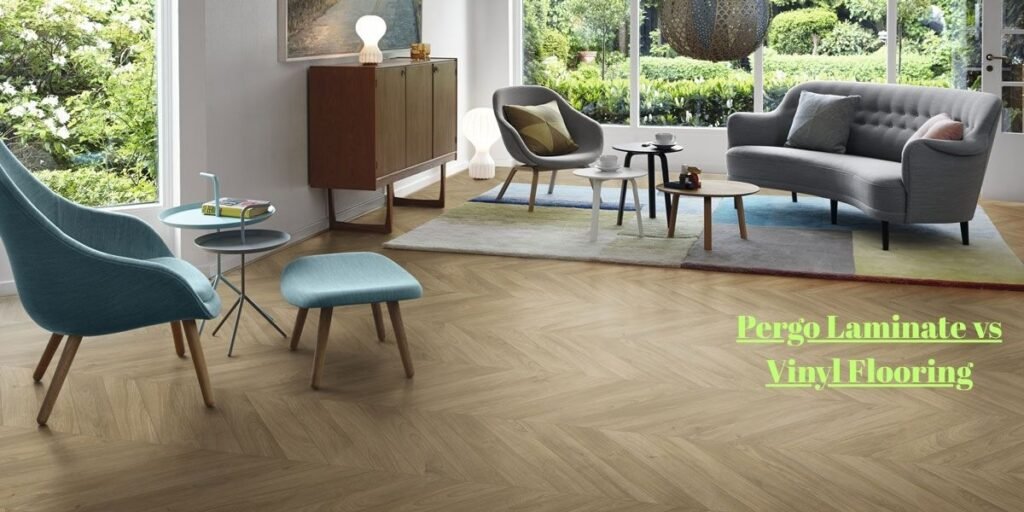
- Hard flooring: Materials like luxury vinyl plank or engineered hardwood provide superior durability, resist spills, and make cleanup fast. Pair hard flooring with a thick, washable area rug or modular play mat in high-traffic play zones to give kids a soft landing surface.
- Foam mats: Useful for specific infant or toddler tumbling zones, but covering an entire room in interlocking foam tiles can trap dirt underneath and create cleaning headaches as children grow.
Select your flooring based on your children’s current ages, your household cleaning tolerance, and how the rest of your home flows into the space.
Choose Finishes That Can Survive Markers, Snacks, and Everyday Wear
A playroom should be engineered for easy maintenance rather than delicate perfection. Wall paint needs to be more than just a pretty color; it must be a washable, scrubbable matte or satin finish that can take a sponge bath when stray marker strokes happen. Baseboards and trim should be painted with durable semi-gloss enamel to shrug off kicks from toy trucks and vacuum cleaner bumps.
Furniture should feature rounded edges to minimize injury during active games, and surfaces should be resistant to scratches and water rings. Avoid investing in permanent child-themed architectural finishes like custom jungle-themed wall murals carved into drywall. Those decorative choices become expensive remodeling burdens three years down the road when your child’s interests shift entirely. Instead, rely on easily replaceable accessories to set the theme.
Build Lighting Around What Happens in the Room
Lighting in a playroom must be layered to support different activities throughout the day. Relying on a single harsh overhead fixture flattens the room and creates eye strain.
Build your lighting plan across three distinct levels:
- General overhead lighting: Provides bright, even illumination for active play sessions and fast evening cleanups.
- Task lighting: Directs focused light onto craft tables, reading nooks, and future homework stations.
- Ambient or accent lighting: Softens the corner reading tent or quiet zone during wind-down periods.
For homes with young children, window treatments require special attention. Never treat window blinds or drapes as a purely decorative afterthought. The Consumer Product Safety Commission strongly recommends cordless window coverings to eliminate potential strangulation hazards associated with dangling pull cords.
Make Safety Part of the Remodel From Day One
Child safety cannot be treated as an afterthought checklist applied at the very end of a renovation. It needs to dictate structural and layout decisions from the beginning.
Key safety integration points include:
- Furniture anchoring: Bolt every bookcase, storage unit, and heavy toy chest securely to wall studs to eliminate tip-over risks during climbing attempts.
- Window protection: Keep climbable furniture well away from windows, install window stops or guards to prevent falls, and verify that emergency escape routes remain completely unobstructed.
- Cord management: Route lamp cords, TV cables, and charging wires securely behind walls or through heavy-duty cord covers so little hands cannot pull on them.
- Electrical safety: Install tamper-resistant outlets or sliding outlet covers if toddlers are using the space, and always hire a licensed professional for new wiring to ensure local building codes are met.
- Age-appropriate toy sorting: Regularly audit the room as younger siblings enter the space to ensure small choking hazards are kept out of reach.
Design for Supervision Without Making Kids Feel Watched
There is a fine operational line between encouraging healthy independence and leaving young children completely isolated. A well-designed home layout allows a parent working nearby to glance in and verify safety without constantly interrupting play.
Positioning matters immensely here. Whenever possible, align the playroom doorway with main living sightlines or use interior glass-paneled doors that let you keep an eye on activities from the hallway or kitchen. Place high-energy or potentially messy activities where they fall naturally within your line of sight, reserving hidden corners for quiet reading spots.
Keep in mind that architectural design can support supervision, but it can never replace active parental oversight appropriate for a child’s age and developmental stage.
Give Kids Enough Variety Without Filling the Room With Toys
Parents often worry that fewer toys will lead to boredom, but research and real-world experience show the opposite. Stacks of unorganized toys often overwhelm children, leading to shorter attention spans and endless clutter.
Instead of displaying every toy simultaneously, adopt a simple toy rotation system. Divide your toy inventory into distinct groups, keep one group out in the active playroom, and pack the rest away in labeled bins in a hall closet or Basement storage area. Every few weeks, swap the bins.
This keeps familiar toys feeling fresh and exciting without requiring you to purchase new items constantly, while keeping the physical floor space clear and manageable.
Make Cleanup Easy Enough That the Room Stays Usable
A beautifully remodeled playroom that requires thirty minutes of intense adult labor every night to reset is a design failure. If cleanup is too complicated, kids will walk away, and parents will end up doing all the heavy lifting.
Design effortless cleanup directly into the physical layout:
- Group toys into large, intuitive categories rather than dozens of tiny, frustrating sorting boxes.
- Use large, open-topped bins where items can be tossed in quickly at the end of a long day.
- Ensure every book, bin, and supply has a designated home immediately adjacent to where it is used.
When storage lives right next to the activity zone, cleanup transforms from a dreaded chore into a manageable part of the daily routine that kids can participate in.
Don’t Turn the Playroom Into a Permanent Nursery
Remodeling a room for a toddler often tempts parents to lean heavily into permanent, highly specific themes. A custom dinosaur habitat painted directly onto the drywall or built-in shelving shaped like woodland tree trunks might look charming for a three-year-old, but those exact choices become expensive demolition burdens when that same child hits seven years old and loses interest in prehistoric creatures.
The most cost-effective long-term strategy relies on a neutral architectural shell. Keep major structural elements, paint colors, and flooring relatively versatile.
Instead of custom built-ins that only serve a nursery, use easily swappable design elements to bring personality into the room:
- Washable area rugs with dynamic patterns or neutral textures
- Framed prints, posters, or canvas art that can be swapped out in minutes
- Fabric bins and storage baskets in coordinating accent colors
- Throw pillows, floor cushions, and textile accents
- Modular furniture that transitions easily from a toddler table to a homework desk
These layers can change as your child’s passions evolve without requiring another round of drywall repair or professional painting.
Plan the Room for the Next Five Years, Not Just This Birthday
A successful playroom remodel must anticipate how a child’s developmental needs shift rapidly over a short window of time. Building for today while ignoring tomorrow guarantees another renovation cycle far sooner than necessary.
An effective age-progression framework ensures the space accommodates growth:
- For toddlers: Prioritize wide-open floor space for crawling and early walking, low and accessible toy bins, soft cushioned surfaces for frequent tumbles, and clear lines of sight from parent vantage points.
- For preschoolers: Introduce dedicated creative surfaces for drawing and crafting, pretend-play staging areas, low bookshelves with forward-facing book displays, and slightly more structured storage categories.
- For elementary-age children: Transition parts of the room to support independent reading, board games, complex building sets, science kits, and hobby collections.
- For older children and preteens: Adapt the room into a quiet study zone, a creative art studio, a gaming lounge, or a comfortable reading retreat.
The room does not need to be rebuilt from scratch at every developmental milestone. Flexible initial infrastructure—such as adjustable shelving tracks and modular furniture—makes the original investment pay off for a decade or more.
Think About Noise Before You Finish the Walls
Children at play generate an immense amount of sound. Without proper acoustic planning, hard surfaces bounce noise around, turning an ordinary afternoon of building blocks into an echoing cacophony that reverberates through the entire house. This becomes especially challenging when parents work from home in adjacent rooms or toddlers need quiet nap times nearby.
Sound dampening should be integrated directly into the finish materials:
- Thick area rugs placed over hard flooring absorb footsteps and dropped toy sounds.
- Fabric window curtains and heavy drapes cut down on high-frequency echo.
- Upholstered furniture and soft storage bins help diffuse sound waves.
- Strategic door placement and solid-core interior doors help isolate noise when needed.
The goal is not to engineer a completely silent room, which is neither realistic nor fun for kids. The objective is to keep ordinary playtime from turning the rest of the living space into a constant acoustic amplifier.
Decide Which Remodeling Work You Can DIY and Which Needs a Pro
Tackling a playroom remodel yourself can save substantial budget, but knowing your limits prevents costly mistakes and safety hazards.
Suitable for DIY
- Painting walls, trim, and doors with durable, washable finishes
- Installing surface-mounted shelving units into wall studs
- Assembling freestanding furniture and modular storage bins
- Hanging artwork, bulletin boards, and cordless window treatments
- Organizing storage systems and labeling bins
Better Suited to Licensed Professionals
- Installing new electrical circuits, wall outlets, or recessed lighting fixtures
- Handling structural wall modifications or removing load-bearing partitions
- Pouring, leveling, or installing major permanent flooring systems
- Constructing complex built-in cabinetry that ties into existing architecture
- Modifying windows, doors, or HVAC ductwork to alter airflow
Local building codes and permit requirements vary significantly by region. Homeowners should always verify local regulations before opening up walls or altering electrical systems, rather than attempting high-risk construction tasks simply to cut corners.
Set the Budget Around What Is Hard to Change Later
When allocating remodeling funds, many homeowners make the mistake of spending heavily on items that are easy to replace later, while cutting corners on permanent structural elements.
To maximize long-term value, structure your budget strategically:
- Spend more on: Durable flooring that resists high wear, essential electrical infrastructure, layered lighting plans, high-quality wall paint, and safety upgrades like secure furniture anchoring.
- Save on: Themed decorative accessories, wall art, small accent tables, fabric storage baskets, and temporary play equipment that will be outgrown in a few years.
Inexpensive decor is simple to swap out as kids grow. Flooring, electrical wiring, and built-in safety features are difficult, messy, and expensive to retrofit once the room is finished.
A Practical Remodeling Sequence
Jumping straight into construction without a clear game plan leads to costly mistakes and wasted effort. Following a structured installation sequence ensures that structural work, electrical rough-ins, and finishes happen in the correct order.
- Assess the room: Take precise measurements of the space, noting door swings, window locations, and structural limitations.
- Define activity zones: Map out where open play, creative projects, reading, and storage will live based on your earlier behavioral observations.
- Plan safety features: Identify window security measures, anchoring points for furniture, electrical outlet needs, and cord management pathways.
- Rough-in electrical and lighting: Run new wiring, install recessed fixtures, and position outlets before closing up any wall cavities.
- Complete construction work: Handle drywall repairs, paint application, flooring installation, and any custom built-in carpentry.
- Install storage systems: Mount low shelving securely to studs, set up closet organizers, and position large storage bins.
- Bring in furniture: Place tables, seating, and modular units while strictly preserving open floor space in the center of the room.
- Set up activity zones: Arrange books, toys, and art supplies in their designated homes right next to where they will be used.
- Add flexible décor: Hang non-permanent artwork, rugs, and soft textiles to pull the design together.
- Conduct a child-height inspection: Get down on your hands and knees to view the room from your child’s physical perspective.
This final inspection is the ultimate test of a successful remodel. Check whether a young child can easily reach appropriate toys, return them independently, move safely across the floor without tripping hazards, and find a quiet place to decompress. Verify that sightlines from nearby living areas remain clear, and confirm that the space is versatile enough to adapt when today’s favorite toy eventually gets packed away.
What to Do When the Playroom Is Small
Limited square footage does not rule out a functional playroom. In fact, a smaller room often forces better design choices by eliminating clutter and keeping the focus squarely on usable floor space.
Strategies for maximizing small playrooms include:
- Prioritize vertical storage: Mount shelving units high up the wall for items requiring adult supervision, leaving lower walls free for child-accessible bins.
- Utilize multi-use furniture: Choose storage benches that double as seating or coffee tables with hidden interior compartments.
- Streamline storage pieces: Opt for fewer, larger storage bins rather than dozens of tiny containers that consume valuable floor area.
- Embrace light visual design: Use bright, reflective wall paint and streamlined furniture to make compact rooms feel open and airy.
- Maintain active toy rotation: Keep fewer items in the room at any given time so the limited floor space never feels cramped or overwhelming.
How to Remodel a Basement, Bonus Room, or Spare Bedroom Into a Playroom
The starting point of your renovation depends entirely on which room in the house you are converting. Each space presents distinct structural realities that must be addressed before the fun decorating work begins.
Spare Bedrooms
Converting an existing bedroom is usually the most straightforward path. The room already features finished drywall, standard interior doors, established HVAC airflow, and conventional lighting, requiring minimal heavy construction.
Basements
Below-grade spaces require careful evaluation before any play equipment moves in.
- Moisture control: Test relative humidity levels and install proper vapor barriers or dehumidifiers to prevent mold growth.
- Egress compliance: Ensure basement windows meet local building codes for emergency exit sizing.
- Flooring selection: Avoid traditional carpet directly over concrete slabs where moisture can accumulate; choose luxury vinyl plank or raised subfloor systems instead.
- Ceiling height and lighting: Compensate for lower ceilings and lack of natural light by installing robust layered overhead and wall lighting.
Bonus Rooms and Attic Spaces
Rooms over garages or finished attics often experience wild temperature swings and heavy noise transmission.
- Thermal comfort: Verify that insulation and HVAC supply lines are sufficient to keep the space comfortable year-round.
- Stair safety: Install secure baby gates at the top of staircases leading down from bonus rooms to prevent dangerous tumbles.
- Acoustic buffering: Add heavy rugs and upholstered furniture to absorb sound traveling down open stairwells into the main living areas below.
The Playroom Should Make Family Life Easier, Not Create More Work
A successful playroom remodel is ultimately measured by how much smoother it makes daily family life.
The room has succeeded when it provides children with a dedicated environment where they can build, create, imagine, read, explore, and practice healthy independence. At the same time, it gives parents a space that remains safe, organized, durable, easy to supervise, and simple to reset at the end of the day.
Avoid the temptation to exhaust your remodeling budget trying to construct the absolute perfect playroom for the exact age your child is today. Focus your energy on building a flexible, adaptable room that keeps working seamlessly as your kids grow, change, and discover new passions.
FAQs
What should you consider before remodeling a playroom?
Evaluate your children’s current ages, daily play habits, room dimensions, natural light, safety requirements, storage capacity, supervision sightlines, and how the space needs to adapt over the next five years.
What flooring is best for a children’s playroom?
The right flooring depends on your children’s ages and your household cleaning tolerance. Luxury vinyl plank and engineered hardwood offer unmatched durability and easy spill cleanup, while wall-to-wall carpet provides soft cushioning for toddlers at the cost of heavier maintenance.
How much storage should a playroom have?
Storage should be calculated based on your actual toy inventory and specific categories rather than a fixed number of bins. The goal is to provide enough accessible space to keep the center of the room open for active play.
How do you make a playroom safe for toddlers?
Anchor all tall furniture and heavy toy chests securely to wall studs, install cordless window treatments, manage loose electrical cords, use tamper-resistant outlet covers, and keep small choking hazards entirely out of reach.
How can you design a playroom that grows with a child?
Use a neutral architectural shell, modular furniture that transitions from toddler tables to desks, adjustable shelving tracks, and easily swappable wall art rather than permanent themed finishes.
How do you keep a playroom from becoming cluttered?
Combine child-accessible low open shelving with a strict toy rotation system, dividing your inventory into bins and swapping them out every few weeks to keep play engaging.
What should go in a small playroom?
Prioritize usable floor space by utilizing vertical wall storage, multi-functional furniture like storage benches, streamlined storage bins, and aggressive toy rotation to prevent overcrowding.
Is it better to use built-in or freestanding playroom storage?
Built-in storage maximizes awkward architectural walls and looks seamless, while freestanding furniture offers the flexibility to rearrange the room as your children grow and their spatial needs change.
Can a playroom also be used for homework?
Yes. Reserve a quiet corner with an ergonomic child-sized desk, strong task lighting, and designated supply storage without sacrificing the open floor area required for active play.
What safety features should a remodeled playroom have?
Essential safety features include secure furniture tip-over restraints, window fall-prevention guards, cordless window coverings, properly managed electrical wiring, and clear sightlines for parental supervision.