Most homeowners start researching insulation only after facing a persistent problem. You might notice rooms that refuse to stay comfortable or utility bills that climb higher every winter.
It is a common misconception that a home built to code remains energy efficient decades later. Building standards have evolved significantly.
According to data from the U.S. Department of Energy, nearly 90% of existing homes in the United States are under-insulated by current thermal comfort standards. This deficiency creates a cycle of heat loss through attic spaces and wall cavities that drains your household budget.
Understanding your home thermal performance requires looking at the building as a holistic system. It relies on two distinct actions: slowing down heat flow and stopping air movement.
When these factors are ignored, the result is a drafty house despite having thick layers of insulation. Physics dictates that heat transfer occurs through three pathways: conduction, convection, and radiation.
Insulation targets conduction through building materials. If you fail to address convective heat loss caused by moving air, your thermal resistance values will not hold up under real-world conditions.
What Home Insulation Actually Does
Insulation functions by trapping small pockets of air to resist the natural flow of heat. Heat always moves from a warmer space to a cooler one.
Your goal is to keep thermal energy inside during the winter and outside during the summer months.
When you install high-quality materials, you increase the thermal resistance of your home boundary. However, if your home has gaps, those spaces act like a chimney.
Warm air rises and escapes through attic bypasses such as around light fixtures, plumbing stacks, or the attic hatch.
The Real Problem in Most Homes
Many homeowners waste resources by adding more insulation to an attic that already has an adequate R-value but suffers from severe air leakage.
Replacing old insulation does little if you do not first identify the leakage points. Professional energy audits often use blower door tests to locate exactly where conditioned air is escaping.
In most residential structures, the attic is the primary culprit. It accounts for up to 25 percent of a home total heat loss.
Addressing these leaks before adding new material is the most cost-effective way to improve your home energy profile.
Types of Home Insulation
Selecting the right material depends on the specific structural needs of your home. Each option has distinct installation requirements and thermal performance characteristics.
Fiberglass Insulation
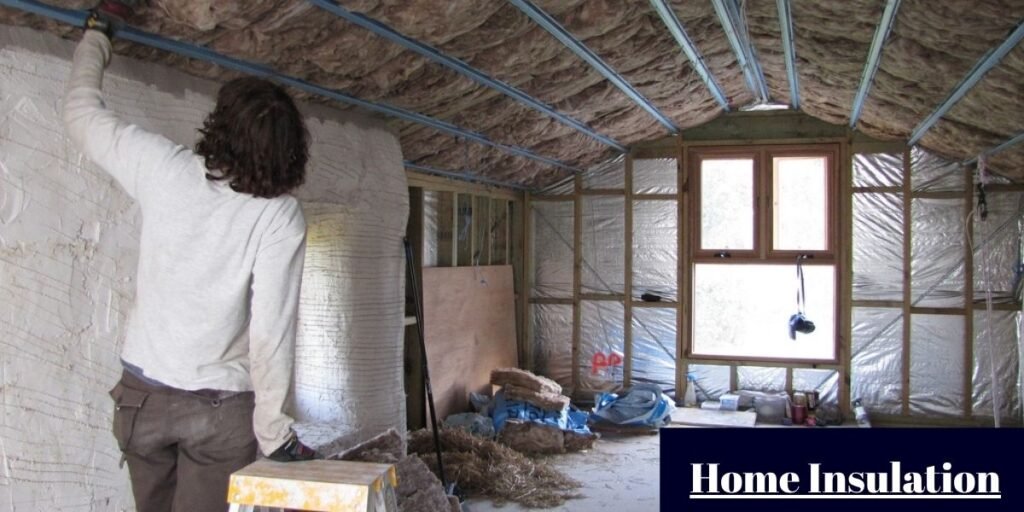
Fiberglass is the most recognizable form of insulation, consisting of fine glass fibers. It is primarily used in attics and wall cavities where it can be laid out in batts or blown in as loose fill.
For DIY projects, major manufacturers like Owens Corning or Johns Manville produce high-quality R-rated batts.
It is an affordable solution, but its effectiveness depends entirely on the quality of installation. If it is compressed, the trapped air volume decreases, which significantly lowers its thermal performance.
Spray Foam Insulation
Spray foam is a high-performance material that expands upon application. It functions as both a thermal barrier and an air seal because it fills every void.
For those looking at DIY kits, Tiger Foam or Handi-Foam offer professional-grade canisters for sealing rim joists or smaller gaps.
This material is categorized into open-cell and closed-cell types.
Closed-cell foam offers a much higher R-value per inch and provides structural rigidity, making it ideal for crawl spaces and areas prone to moisture. While more expensive, it often pays for itself in homes with complex framing.
Cellulose Insulation
Cellulose is made from treated recycled paper products. It is frequently used in loose-fill applications for attics or as a dense-pack material for retrofitting closed walls.
Because it is denser than fiberglass, it performs better at stopping air movement through convection. It is an environmentally conscious choice, but installers must ensure it is kept dry, as moisture can lead to settling or structural damage.
Rigid Foam Board
These are solid panels of expanded or extruded polystyrene. They are commonly used for exterior sheathing, foundation walls, or basement floors.
Look for brands like Dow or Owens Corning Foamular when insulating basement walls or cold floors.
Rigid foam provides a continuous thermal break, which is superior to standard batt insulation because it eliminates the thermal bridging that occurs through wood studs. It is a highly effective way to insulate masonry walls that cannot be filled with traditional materials.
R-Value Explained
The R-value is the standard unit of measurement for thermal resistance. A higher R-value indicates that a material is more effective at stopping heat from flowing through it.
Government guidelines suggest specific ranges based on your local climate zone. For attics in many U.S. regions, the target is between R-30 and R-60.
Walls typically require R-13 to R-21. For region-specific recommendations, review the official insulation R-values in USA guidance based on your climate zone.
These values are cumulative, meaning you can achieve the target by layering different materials. It is important to remember that R-values are measured in lab settings.
Real-world performance, especially in older homes, is often lower due to moisture, settling, or poor installation. Targeting the higher end of the recommended range is standard practice for energy efficiency upgrades.
Air Sealing vs Insulation: The Critical Difference
Many homeowners make the mistake of adding more insulation without first sealing the building envelope.
Insulation slows down heat transfer by trapping air inside a material.
Air sealing stops the actual movement of air through gaps, cracks, and penetrations.
If you do not seal the air leaks, your insulation acts like a filter rather than a barrier. Air carries moisture and heat, and if it moves through your fiberglass or cellulose, it significantly degrades the performance of the system.
The most common air leakage points in residential homes include:
- Window and door frames
- Attic hatches
- Plumbing and electrical penetrations through top plates
- HVAC duct joints
- Rim joists in basements
Sealing these gaps with expanding foam, caulk, or weather stripping provides immediate improvements in comfort that insulation alone cannot achieve. For sealing gaps, a high-quality silicone caulk like DAP or a canned spray foam like Great Stuff is a standard tool in every energy rater’s kit.
How to Identify Poor Insulation
Most homeowners do not realize their insulation is failing until they notice persistent symptoms in their daily living environment.
If you find that your HVAC system runs constantly but the house never feels stable, you are likely dealing with thermal bridging or bypasses.
Look for these red flags:
- Significant variations in room temperatures throughout the house
- Excessive drafts near doors, windows, and electrical outlets
- Walls that feel cold to the touch during winter months
- Dust patterns on carpet or ceiling drywall, which often indicate air moving through gaps
- Unusually high monthly heating and cooling bills compared to neighbors with similar home sizes
These signs suggest that your home is not a sealed system, but a leaky container losing conditioned air to the outside.
Home Insulation Costs
Costs for insulation upgrades vary widely depending on the material, the labor complexity, and the square footage involved.
For the average homeowner, a mixed approach is often the most economical.
- DIY Air Sealing: Expect to spend between $20 and $200 for high-quality caulk, expanding foam, and weather stripping. This is the highest return-on-investment upgrade you can perform.
- Attic Insulation Upgrade: Professional installation of blown-in cellulose or fiberglass to bring an attic to R-49 or higher typically costs between $1,500 and $3,500.
- Full Home Retrofit: For a full-home insulation and air-sealing upgrade, costs can range from $3,000 to over $10,000.
While spray foam is on the higher end of this spectrum, it often provides the best long-term efficiency because it handles both air sealing and insulation in one application.
Energy Savings and Efficiency
A properly insulated and sealed home is significantly more efficient than a home with simple high-R-value material.
Data shows that homes with high-performance envelopes often see a 20 percent to 40 percent reduction in annual energy bills.
Beyond the direct savings on utility costs, you also benefit from:
- Reduced strain on your HVAC equipment, which can extend the lifespan of your furnace and air conditioner
- More consistent indoor air quality, as properly sealed homes have better control over air exchange
- Significant improvements in noise reduction from the outside
The largest immediate gains typically come from prioritizing the attic, as it is the most significant source of convective heat loss in most residential structures.
Common Mistakes to Avoid
Even with the best materials, poor execution will lead to failure.
One of the most frequent errors is blocking attic ventilation. Your attic needs to breathe. If you block the soffit vents with insulation, you trap moisture, which will lead to mold growth and roof deck rot over time.
Another major mistake is ignoring the basement or crawl space. These areas are often the most neglected but are major sources of cold floors and damp air that travels upward through the rest of the home.
Finally, never install insulation over recessed lighting unless the fixtures are rated for direct insulation contact, known as IC-rated. Otherwise, you create a major fire hazard.
Final Thoughts
Home insulation is not a one-time product purchase. It is a comprehensive system of air sealing, strategic material selection, and professional installation.
The most effective homes are not just insulated. They are correctly balanced for airflow and thermal resistance.
If you are planning an upgrade, start with air sealing. Once the gaps are closed, you can add insulation strategically, starting with the attic.
This phased approach allows you to transform your home comfort and energy efficiency without unnecessary, costly overhauls. Small, deliberate improvements in these areas often lead to noticeable comfort results almost immediately, proving that the most efficient energy is the energy you do not have to purchase in the first place.