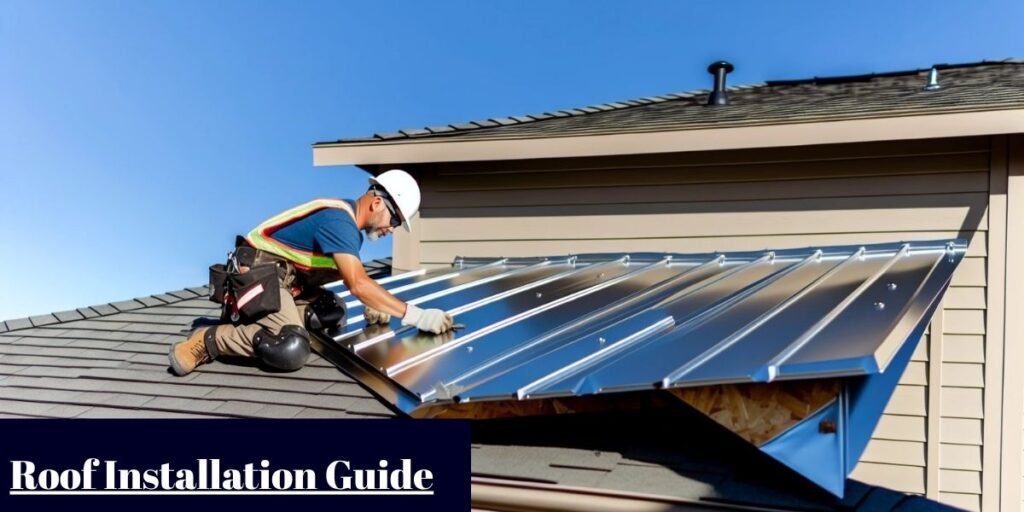
A roof is not merely a collection of shingles or metal panels. It is a sophisticated engineered weather protection system that sits at the literal front line of your home’s defense against the elements.
If designed and installed correctly, it manages water runoff, regulates attic temperatures through airflow, and resists thermal expansion for decades. If any component is compromised, the failure often remains hidden beneath the surface until significant interior damage occurs.
Many homeowners incorrectly view a roof replacement as a simple cosmetic upgrade. In reality, it is a complex structural project involving water-shedding geometry, vapor control, and mechanical fastening.
A premium material like GAF Timberline HDZ or CertainTeed Landmark shingles will only reach its intended service life if the assembly beneath it is executed with precision. Reliability is born from the deck up, not from the top down.
Understanding the Purpose of a Roofing System
The visible layer you see from the street is the shed layer, but the performance of your home rests on the assembly beneath it. A high-performing roofing system integrates multiple layers that must function in harmony.
The core components required for a functional roof include:
- Structural roof framing and wood decking
- High-performance underlayment or ice and water shield
- Corrosion-resistant drip edge flashing
- Proper intake and exhaust ventilation channels
- Shingle or metal roof coverings
- Integrated drainage and gutter systems
When one element fails, the entire assembly becomes vulnerable. An improperly installed drip edge, for instance, allows wind-driven rain to curl back under the shingles and rot the wooden fascia boards, regardless of how high-quality the shingles themselves are. Professional installation is the art of ensuring each layer sheds water into the next without obstruction.
When Is Roof Installation Necessary?
Deciding when to replace a roof requires a departure from subjective visual judgments. Professional evaluators look for specific markers of system fatigue that suggest repair is no longer an economical path.
Frequent leaks are the most obvious warning sign. If water is entering your home from multiple locations or if you have patched the same spot multiple times, the underlying waterproofing barrier has likely reached the end of its functional life. Patching localized areas of an aging roof often leads to recurring issues as adjacent shingles continue to lose their elasticity and granular coating.
Visual signs of deterioration include shingles that are curled, cupped, or missing large sections of their protective granular coating. Ultraviolet exposure eventually breaks down the asphalt binders in shingles, causing them to become brittle. Once you see the fiberglass matting exposed through the granules, the material has lost its ability to shed water effectively.
Sagging roof lines demand immediate, non-negotiable attention. This is rarely a roofing material issue. It indicates structural stress on the rafters or trusses, often due to rot, inadequate sizing for snow loads, or foundation settlement. You cannot safely install new, heavy roofing materials on a frame that has already begun to deflect.
Roof Installation vs Roof Replacement vs Roof Overlay
Understanding the terminology is essential for communicating with contractors. New Roof Installation is exclusive to new construction and requires a full structural assembly.
Roof Replacement involves stripping the old system completely to the bare deck. This allows the contractor to inspect the structural integrity of the wood and replace any water-damaged OSB or plywood. This is the gold standard for long-term home health.
Roof Overlay, or “reroofing,” is the practice of installing new shingles directly over the existing layer. While this saves money in the short term, it is generally discouraged by experts for several reasons:
- It traps heat, which shortens the lifespan of the new shingles by up to 20 percent.
- You cannot inspect the deck for rot or structural decay.
- Most manufacturers will not honor the full warranty.
- It increases the dead load on your roof framing, which may exceed local building codes for older structures.
Choosing the Right Roofing Material
Your choice of material defines the cost, maintenance requirements, and insurance profile of your home. Asphalt shingles remain the domestic preference, particularly in the Architectural variety. Brands such as Owens Corning and IKO produce high-quality architectural shingles that provide a dimensional aesthetic and are rated for Class 3 or Class 4 impact resistance against hail.
Metal roofing, specifically Standing Seam systems, represents a major step up in performance. These panels lock together to prevent water from ever seeing a fastener. They are exceptionally effective in heavy snow regions and wildfire-prone areas because they do not combust. While the initial capital investment is higher than asphalt, a properly installed metal roof often lasts 50 years or longer with minimal maintenance.
Clay and Concrete Tile are staples of the American Southwest and coastal regions. They offer unmatched thermal mass, helping to keep homes cooler during peak heat. However, they are incredibly heavy. You must ensure your home’s framing is engineered to support the static weight of these tiles. If you are retrofitting an asphalt roof to tile, a structural engineer must sign off on the load-bearing capacity of your walls and trusses.
Slate and Cedar Shake represent the apex of luxury roofing. Natural slate is virtually indestructible, often outlasting the building itself, but it requires a specialized installer who understands how to cut and drill the stone. Cedar shake provides a beautiful, natural aesthetic but requires periodic chemical treatments to resist moss and rot. Both require steep-slope expertise and have very limited contractor pools.
Roofing Underlayment: The Hidden Layer That Protects Everything
Many homeowners operate under the misconception that shingles serve as the primary waterproof barrier for their home. They do not. The shingles are the shed layer, designed to deflect the bulk of water, but the true protection lies in the underlayment installed directly against the wood deck. This layer acts as your second line of defense whenever wind-driven rain forces water beneath the shingles or if a single component suffers a breach.
Traditionally, asphalt-saturated felt was the standard, but it is increasingly being replaced by synthetic underlayment. Synthetic products offer superior tear strength and UV resistance. They do not buckle when exposed to moisture and provide a much safer, non-slip walking surface for installers. For a project intended to last thirty years, synthetic underlayment is an essential upgrade over standard felt.
In regions that experience freezing winters, Ice and Water Shield is non-negotiable. This self-adhering, rubberized membrane is installed at the eaves, in the valleys, and around all penetrations. It creates a complete seal that prevents water from backing up into the structure when ice dams form on the roof edge. Without this barrier, winter leaks can migrate deep into your attic, causing rot and mold that remains hidden until it is too late.
Proper Roof Ventilation Matters More Than Most Realize
A perfectly installed roof can still fail within five to ten years if the attic ventilation is inadequate. Your attic needs to act like a chimney; it must pull cool air from the soffits and exhaust it through the ridge or roof vents. This balance is critical because it keeps the roof deck temperature close to the ambient outside temperature.
Without this airflow, trapped heat creates an oven-like environment in your attic during the summer, often exceeding 150 degrees Fahrenheit. This thermal stress literally cooks the underside of your shingles, causing them to lose their oils and crack prematurely. It also creates a breeding ground for mold and degrades your interior insulation.
Intake ventilation typically happens at the soffits, while exhaust ventilation occurs at the ridge. A common mistake is allowing attic insulation to block the intake vents, effectively suffocating the roof. If you have an older home, ensure your contractor installs baffles or rafter vents to keep those intake channels open. A balanced system, where the square footage of intake matches the square footage of exhaust, is the key to longevity.
Roof Flashing: The Most Common Source of Leaks
If you look for the source of a roof leak, you will rarely find it in the middle of a large shingle field. You will almost always find it at a roof intersection. Flashing is the metal or composite material used to seal the gaps where the roof meets a chimney, a wall, or a plumbing vent.
The best flashing is made of aluminum, galvanized steel, or copper. During a roof replacement, reusing existing, pitted, or rusted flashing is a professional malpractice. New flashing must be layered using the step-flashing technique, where each piece of metal overlaps the one below it. This ensures that any water running down the slope is guided over the top of the metal, rather than behind it.
Pay specific attention to the plumbing pipe boots. These rubber seals are exposed to constant sunlight and dry out over time, usually failing before the shingles themselves. Upgrading to a lifetime-rated flashing system, such as a lead-boot or a high-durability composite, can prevent the most frequent cause of minor roof leaks.
Installing Roof Decking and Drip Edge
Before any waterproofing begins, the contractor must evaluate the structural foundation. If inspection reveals soft spots, delamination, or rot, that plywood or OSB (Oriented Strand Board) must be replaced. Installing premium shingles over damaged decking is like building a house on sand; the nails will not hold properly, and the structural integrity will be compromised.
Once the deck is secure, the drip edge is installed. This is a simple L-shaped metal strip that hangs over the edge of the roof. It performs two vital jobs: it directs water into the gutter instead of letting it drip behind the fascia, and it protects the edge of the wooden deck from moisture absorption.
The drip edge must be installed under the underlayment at the eaves but over the underlayment at the rakes. This specific sequence of overlapping is what keeps water moving away from the building, and it is a standard professional installation requirement.
Installing the Roofing Material
Once the deck is secure and the underlayment is verified, the installation of the visible roofing material begins. Regardless of the material, professional installers must follow the specific manufacturer fastening patterns and installation sequences. This is where most residential roofing projects either succeed for decades or fail prematurely.
Every manufacturer has a specific nail zone for their shingles. If a roofer drives nails too high above this line, the shingles have insufficient holding power and become vulnerable to wind uplift. If nails are driven too deep, they can puncture the shingle surface. Professional crews utilize high-pressure pneumatic tools, but they must be calibrated to ensure the nail head sits flush with the shingle surface without penetrating or tearing the material.
The installation sequence always starts from the eaves and works upward toward the ridge. The starter strip is the most critical row, as it provides the necessary adhesive bond to keep the first layer of shingles secured against high winds. Installers use a staggered pattern for the subsequent rows to ensure the seams do not align.
If seams align, water can easily track down the roof and compromise the underlayment. Proper offset patterns ensure that water sheds horizontally and vertically across the entire roof plane without ever encountering a direct path to the deck.
Installing Roof Ridge Components
The ridge is the highest point of the roof, and it acts as the intersection where two roof planes meet. While it may look like a simple finishing touch, it is a high-stress area that requires specialized materials. You should never use standard field shingles for the ridge. Instead, use dedicated ridge cap shingles which are engineered to be thicker and more flexible, allowing them to bend over the peak without cracking.
If your attic ventilation design relies on a ridge vent, the contractor must first cut a precise slot along the peak of the roof. This slot must be narrow enough to maintain structural integrity but wide enough to allow the hot attic air to escape. The ridge vent assembly is then installed over this opening, followed by the ridge cap shingles.
A well-installed ridge will provide:
- Continuous weather-sealed protection at the roof apex.
- Unrestricted exhaust airflow for the attic.
- High resistance to wind-driven rain and snow infiltration.
- A clean, uniform aesthetic that matches the roof’s color and texture.
Gutters Are Part of the Roofing System
It is a mistake to treat gutters as a separate, decorative project. From a building science perspective, gutters are the final stage of your roof’s drainage system. Even the most perfectly installed roof will suffer from moisture damage if the water is allowed to pool at the foundation or splash back onto the siding.
Your gutter system must be sized according to the square footage of your roof and the average rainfall of your region. A standard five-inch gutter may be insufficient for a large, steep roof in an area prone to heavy storms, which is why six-inch seamless gutters are increasingly common in professional retrofits.
The installation must include a precise slope toward the downspouts, usually about one-quarter inch for every ten feet of gutter run. If the slope is too flat, water will sit in the gutter and promote rust or mosquito growth.
If the downspouts terminate directly against the foundation, they will eventually cause soil erosion and basement moisture issues. Every downspout should be fitted with an extension that discharges water at least four to six feet away from the structure.
Final Roof Inspection Before Completion
Before the crew leaves, a comprehensive final inspection is mandatory. This is not a casual walk-through; it is a systematic verification of the entire assembly. The lead installer should inspect every valley, every pipe boot, and every chimney flashing to ensure the sealant is properly applied and the metal is secure.
A professional inspection verifies:
- That no exposed nail heads remain on the ridge or flashing.
- That the shingles are properly bonded to the starter strips.
- That the attic ventilation intake and exhaust paths remain clear.
- That all debris, including stray nails or shingle scraps, is cleared from the yard and gutters.
- That all penetration seals (like those around vents) are watertight.
Many high-end contractors use high-resolution drones for this inspection. This allows them to view the roof from a top-down perspective to check for shingle alignment and ensure that the ridge vents and flashing are seated perfectly. Documentation of this inspection provides the homeowner with a record of a job done correctly, which is vital for any future warranty claims.
Roof Installation Costs
Roofing estimates vary based on the specific variables of your property. While it is tempting to focus on the price per square, which is the industry term for 100 square feet of roofing, the total investment is driven by the complexity of the assembly. A simple gable roof is significantly cheaper to install than a house with multiple dormers, skylights, and complex valleys that require custom flashing work.
- Roof Size: Total surface area directly dictates material and labor requirements.
- Material Choice: Asphalt shingles sit at the entry-level price point, while synthetic slate, metal, or natural stone represent premium investments.
- Roof Pitch: Steep slopes require specialized fall protection and scaffolding, which adds labor days and safety insurance costs to the bid.
- Structural Repairs: If the decking is rotten, your final invoice will reflect the cost of new wood and the labor to remove and replace it.
- Permits and Waste: Every professional project includes permit fees and dumpster rental for debris disposal.
As a general baseline, a standard asphalt shingle replacement for a mid-sized home often ranges from $8,000 to $18,000. Premium metal or tile systems can push that figure well beyond $30,000 or $50,000. When reviewing quotes, ensure they are itemized.
A vague quote that lacks detail on underlayment type, flashing materials, and ventilation upgrades is a red flag. The cheapest bid often omits critical steps like full flashing replacement or proper ridge ventilation, which leads to early failure.
How to Choose the Right Roofing Contractor
The success of your roof depends entirely on the crew performing the labor. A high-quality shingle from a brand like GAF, CertainTeed, or Malarkey will perform poorly if the installer takes shortcuts. Your contractor selection process must be rigorous.
- Licensing and Insurance: Never hire a contractor who cannot provide proof of active state licensing, general liability insurance, and worker compensation.
- Manufacturer Certification: Top-tier manufacturers grant “Master” or “Elite” status to contractors who undergo factory training and have been in business for a specific number of years. These companies are often the only ones authorized to offer extended manufacturer warranties.
- Local References: Ask for addresses of projects completed three to five years ago. This allows you to drive by and observe how the work has held up to local weather.
- Warranty Clarity: Differentiate between the manufacturer’s material warranty and the contractor’s workmanship warranty. A ten-year workmanship guarantee is a sign that the company stands behind its installation.
Avoid any contractor who pressures you into an immediate decision, asks for full payment upfront, or lacks a physical business address. A professional will provide a written, detailed scope of work that outlines exactly what happens if they discover rot under your shingles.
Common Roof Installation Mistakes
Many premature roof failures stem from installation errors rather than defective materials. Recognizing these mistakes helps you spot issues during the construction phase.
- Poor Ventilation: Closing off soffit vents with insulation is the most common way to shorten a roof’s life. It creates a heat trap that damages shingles from the inside out.
- Improper Fastening: Using an incorrect number of nails per shingle or using a nail gun set to the wrong pressure will cause shingles to blow off during a windstorm.
- Reusing Old Flashing: New shingles paired with old, pitted chimney flashing will almost always leak at the intersection within two years.
- Neglecting the Drip Edge: Skipping the drip edge or installing it over the underlayment at the eaves allows water to rot the fascia boards and sub-roofing.
- Valley Shortcuts: Improperly weaving or cutting shingles in the valley allows water to pool or channel incorrectly, creating a primary leak point.
If you are on-site during installation, look for the step-flashing at the walls and ensure the nails are placed exactly where the manufacturer specifies. If the crew is working during a light rain, ask them to stop; installing underlayment on a saturated deck traps moisture that leads to mold.
Roof Maintenance After Installation
A new roof is an asset that requires periodic oversight. You do not need to walk on your roof, but you should inspect it from the ground or with binoculars after every major storm.
- Cleaning Gutters: Clogged gutters cause water to back up under the drip edge and rot your roof deck. Clean them at least twice a year.
- Debris Removal: Branches that scrape against shingles will wear away the granules, exposing the fiberglass matting. Keep trees trimmed at least six feet away from the roofline.
- Flashing Checks: If you see any signs of rust or sealant peeling around vents and chimneys, call a professional to perform a quick repair.
- Attic Monitoring: Check your attic rafters during the first heavy rainstorm after installation. If you see water staining, it is easier to trace the source of the leak when the system is brand new.
Promptly addressing small items—like a loose shingle or a cracked boot—is the difference between a roof that lasts its full design life and one that requires an early, expensive replacement.
When Roof Replacement Is Better Than Repair
Every roofing professional eventually faces the question of whether a specific issue justifies a full replacement or a targeted repair. While it is always tempting to seek the lower-cost option, there are clear indicators that signal your system has reached a point of systemic failure.
If your roof is within five years of its expected service life, investing significant capital into repairs is generally a poor financial strategy. At this stage, the surrounding materials have likely become brittle, and a repair to one area often triggers a failure in the adjacent section due to the stress of foot traffic.
If you find yourself scheduling repairs multiple times a year, you are essentially paying for a new roof in small, inefficient installments without gaining the benefit of a modern, warrantied system.
Furthermore, structural integrity is non-negotiable. If a roof inspection reveals that the roof decking is suffering from widespread rot or that the framing has shifted due to long-term moisture intrusion, no amount of shingle work will fix the problem.
In these instances, the decking must be stripped to allow for necessary structural reconstruction. When you reach this level of intervention, a full replacement is the only logical path forward because the cost of labor to remove the old roof has already been incurred.
Final Thoughts
Roof installation is arguably the most critical structural investment you will make for your home. While the finish material is what provides the aesthetic, the true longevity of your roof is determined by the quality of the unseen layers—the deck, the flashing, the underlayment, and the ventilation.
Professional success in roofing comes from meticulous planning and strict adherence to best practices. By focusing on climate-appropriate materials and ensuring that every transition is correctly sealed, you create a barrier that reliably defends your home against the extremes of the American climate.
Avoid the urge to cut costs by choosing the lowest bidder. Instead, prioritize contractors who demonstrate technical mastery, use industry-leading materials, and understand how to integrate the roof into the broader building envelope.
When done correctly, your roof serves as a silent, reliable protector that enhances your home’s energy efficiency and shields your family for decades to come. Treat your roof as an engineered system, maintain it with regular inspections, and you will secure the long-term value of your property.
Frequently Asked Questions
How long does roof installation take?
Most residential asphalt shingle projects are completed within one to three days. Factors such as the size of the home, the complexity of the roof geometry, and the weather conditions will dictate the timeline. Larger projects or those using premium materials like slate or tile will naturally require more time.
Can a new roof be installed over old shingles?
While some regional codes may permit a single overlay, professional standards almost universally recommend a complete tear-off. Removing the old roof allows the contractor to verify that the underlying wood deck is sound and ensures that the new underlayment is installed directly against the deck for maximum waterproofing.
Which roofing material lasts the longest?
Natural slate is the gold standard for longevity, frequently remaining functional for over 100 years when properly maintained. Metal, clay tile, and high-end concrete tiles also provide exceptional durability, often outperforming any asphalt-based product.
Does a new roof increase home value?
Yes. A professionally installed, modern roofing system is one of the top features prospective buyers look for. It provides immediate curb appeal and offers the peace of mind that the home will not require a major capital expenditure in the near future, which can be a decisive factor in real estate transactions.
Is roof installation covered by homeowners insurance?
Insurance typically covers replacement if the damage is the direct result of a sudden, covered event like a windstorm, hail, or a fallen tree. It does not cover the natural aging process or neglect. Always consult with your insurance provider and a professional roofer to document storm damage accurately if you suspect your roof has been compromised by weather.