A home surveillance system has evolved from a niche professional installation into a fundamental component of modern residential safety. Homeowners no longer view these systems as mere recording devices. They serve as an active deterrent against property crime, a verification tool for alarms, and a means to manage daily domestic logistics.
The complexity of the market often leads consumers to prioritize marketing buzzwords over actual security performance. You might be tempted by high resolution claims or flashy app features. However, a camera that captures sharp images is useless if it lacks the correct field of view, night vision capability, or reliability to transmit data during a critical event.
Effective security is defined by how well the equipment integrates into the specific architecture of your home. This process requires a shift from passive shopping to active risk management. You are not buying a gadget. You are designing an infrastructure that must withstand environmental conditions, network outages, and attempted tampering.
Start by Identifying Your Security Objectives
Defining your objectives prevents the common pitfall of overspending on hardware that fails to solve your specific security problems. You must categorize the vulnerabilities of your home into distinct scenarios.
- Monitoring package deliveries to confirm receipt or document theft.
- Verifying identity of visitors at the primary entrance.
- Observing high value assets such as vehicles parked in driveways.
- Establishing perimeter alerts for unauthorized access to rear yards.
- Checking on the status of detached structures like workshops or sheds.
If your primary concern is package theft, a wide angle doorbell camera with integrated motion analytics is often superior to a high end turret camera mounted high on a corner. If you are protecting a detached garage or rural gate, you need long range optical capability and weather sealed enclosures.
Conduct a Property Risk Assessment
Security design begins with a physical audit of the property. You must view your home through the eyes of an unwanted visitor. Walk your perimeter during the day and again at night to identify environmental factors that affect visibility.
Focus on primary entry points first. Intruders favor front doors, rear sliding glass doors, and ground level windows. A camera at these locations serves as both a record and a barrier.
Identify areas that lack natural surveillance. If a side yard is shielded by tall hedges or fences, it becomes a staging ground for unauthorized movement. Professional security designers call these hidden areas blind spots. You should prioritize these locations for motion activated lighting or high sensitivity surveillance coverage.
Note the location of high value items. If you store professional tools in a shed, leave recreational gear in the driveway, or keep sensitive equipment in a workshop, these assets require dedicated camera coverage that provides enough detail to identify individuals in the event of loss.
Understanding the Types of Home Surveillance Systems
The backbone of your system is the transmission method. This choice determines the reliability of your video feed and the long term maintenance requirements of your setup.
Wired systems, typically using Power over Ethernet (PoE), are the gold standard for consistent security. These systems use a single cable to provide both power and data to the camera. Because the connection is hardwired to a local Network Video Recorder (NVR), the video feed does not rely on your Wi-Fi signal. Brands like Hikvision, Dahua, or Ubiquiti UniFi offer professional grade wired kits that function even if your internet service goes down.
Wireless or battery powered cameras leverage your existing Wi-Fi network. They offer extreme flexibility for renters or homeowners who cannot drill through exterior walls. Manufacturers such as Arlo, Eufy, or Google Nest dominate this space. These systems are highly effective for basic monitoring but they are susceptible to signal interference and require regular battery charging or solar panel maintenance.
Hybrid systems are increasingly common in professional residential setups. You might use a wired PoE system for the critical exterior coverage of your front and back doors while deploying wireless cameras for temporary or hard to reach interior locations. This approach balances the rugged reliability of a local NVR with the convenience of wireless expansion.
Choosing the Right Camera Types
The physical form factor of the camera affects how it performs in different environments and how much attention it draws.
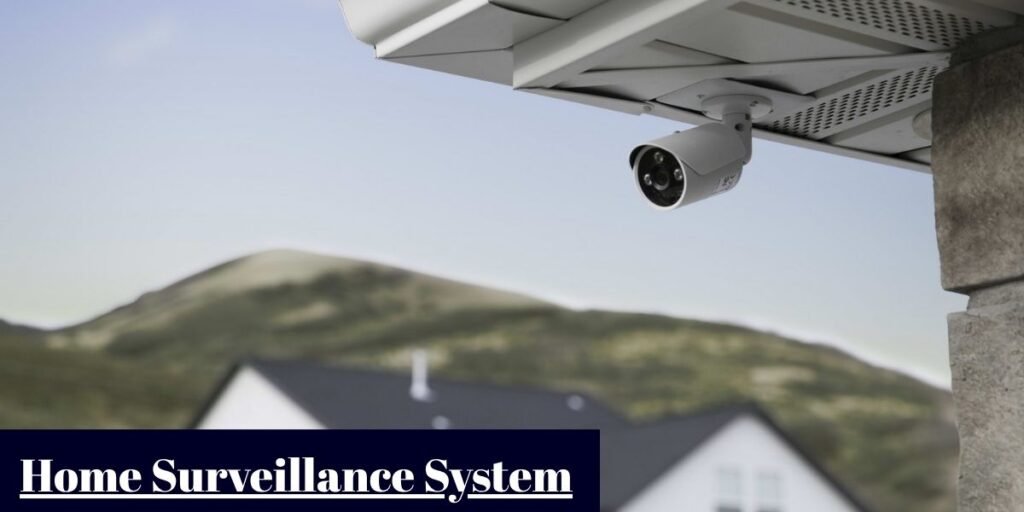
Bullet cameras are the most recognizable security devices. They are designed to be conspicuous, which acts as a deterrent in driveways or large open areas. Their housing is generally easier to aim precisely toward a long path or gate.
Dome cameras are favored for their low profile and durability. The lens is encased in a protective shell, making them resistant to vandals who might attempt to tilt or break the camera. They work best on porches or soffits where a discreet look is preferred.
Turret cameras are the current preference for professional installers. They provide the vandal resistance of a dome but avoid the issues with IR glare that occur when dirt or spiders collect on a dome lens. Turret cameras allow for easy adjustment of the camera angle after installation.
Pan-Tilt-Zoom (PTZ) cameras are specialized tools for massive properties. You can control these units via an app to track movement across an acre of land. They are generally excessive for standard suburban lots where fixed wide angle cameras provide better constant coverage of your property lines.
Camera Resolution: Understanding What Actually Matters
It is easy to get caught up in the marketing hype surrounding 4K or 8K resolution, but resolution is only one piece of the puzzle. The true indicator of success is the ability to extract usable information from the footage, such as identifying a face or a license plate.
For most suburban properties, 2K resolution (also known as 1440p) provides a perfect balance. It offers significantly more detail than standard 1080p without putting excessive strain on your home network or storage hardware. If you are monitoring a wide driveway or a large backyard, 4K resolution is beneficial because it allows you to zoom in digitally on a recorded clip without the image becoming a pixelated mess.
The sensor size and lens quality are often more important than the pixel count. A 4K camera with a poor-quality, small sensor will produce grainy images in low light, whereas a 2K camera with a large sensor and high-quality optics will produce clear, crisp video.
When evaluating cameras, look for sensors larger than one third of an inch, as these capture more light and perform better during the critical twilight hours.
Night Vision Is Essential
Security threats do not respect daylight hours. A high-resolution camera that turns into a black screen at night is a failure in your security plan.
Most modern cameras use Infrared (IR) LEDs to illuminate the scene. While this creates a high-contrast black-and-white image, it can struggle to show specific details like clothing color or vehicle make. If you need color at night, look for cameras with Color Night Vision or Starlight technology. These cameras have highly sensitive sensors that can resolve images using even small amounts of ambient light from streetlamps or porch lights.
For complete coverage, many professionals opt for cameras that include a supplemental white LED light. When the camera detects motion, this light turns on, which both illuminates the scene for clear color video and serves as a powerful deterrent.
Understanding Video Storage Options
Your storage strategy determines how long you can review past events and who has access to your data. There are two primary schools of thought here, and many professionals combine both.
- Local Storage (NVR/DVR): Using a dedicated Network Video Recorder with a high-end surveillance-rated hard drive (like the Western Digital Purple series) gives you complete sovereignty. You pay no monthly fees, and your video data never leaves your home network. This is the fastest, most reliable method for scrubbing through footage.
- Cloud Storage: Subscription-based services from providers like Ring, Nest, or Arlo offer off-site protection. If an intruder smashes your cameras or steals the NVR, your evidence is still safe in the cloud. The trade-off is a recurring monthly cost and a reliance on your internet upload speed to save the footage.
The most robust strategy is a hybrid setup where your cameras record continuously to an on-site NVR for instant access, while simultaneously uploading event-based clips to a cloud server for redundancy.
Motion Detection and Smart Analytics
Early surveillance systems triggered an alarm every time a tree branch swayed in the wind. Today, advanced motion analytics use Artificial Intelligence to distinguish between a human, a vehicle, and a stray cat.
Effective smart analytics allow you to draw activity zones on your screen. You can tell the camera to ignore the street where cars pass constantly, but alert you if anyone steps onto your front porch. When shopping, prioritize systems that offer Person Detection and Vehicle Detection. This feature alone will eliminate 90 percent of the false alarms that plague basic systems.
Camera Placement Best Practices
The best camera in the world will fail if it is placed in the wrong spot. Most homeowners mount cameras too high, which results in footage of the tops of people’s heads rather than their faces.
Mount cameras at a height between seven and nine feet for optimal facial identification. At the front door, ensure the camera is positioned to capture a clear view of anyone walking up the steps. In the driveway, angle the lens to view the approach, but ensure it is not facing directly into a bright light source or a street lamp, which can trick the camera’s auto-exposure and result in a silhouette.
Protect your rear and side access points by mounting cameras that provide overlapping fields of view. An intruder should not be able to cross your property without being captured by at least two distinct cameras. This redundancy ensures that even if one camera is tampered with, the second one has already recorded the evidence.
Protecting Privacy While Maintaining Security
Balancing your need for safety with the reasonable privacy expectations of neighbors and guests is a technical and social necessity. Modern surveillance systems provide tools to manage this responsibly.
Most high-end camera software allows you to implement Privacy Masking. This feature enables you to black out specific areas within the camera’s field of view. If your camera catches a slice of a neighbor’s window or a private patio, you can digitally mask those areas so they are never recorded or visible in the live feed.
Beyond software, physical placement is the best privacy tool. Avoid pointing cameras directly at areas where people expect solitude. Aim your cameras so that they prioritize your property lines, entryways, and transit paths rather than expansive views of the public street or adjacent homes. If you must monitor a public-facing area, ensure you are in compliance with local regulations, which may require clearly posted signage indicating that the property is under video surveillance.
Integration with Smart Home Systems
A standalone camera is a recording device, but an integrated system is an active security hub. True smart home integration connects your surveillance to your lighting, locks, and alarms to create an automated response to threats.
- Triggered Lighting: Link your cameras to smart exterior lighting via a hub like Home Assistant or Samsung SmartThings. When a camera detects a person at 2 AM, the porch and driveway lights can turn on instantly, which acts as an immediate deterrent.
- Smart Lock Coordination: If you use a smart lock, you can create an automation where the door unlock event triggers a high-priority snapshot sent to your phone, confirming exactly who entered the house.
- Alarm Synchronization: If your security system detects a forced entry, the surveillance system can be programmed to start high-frame-rate recording on all cameras simultaneously, ensuring you have the best possible evidence of the event.
Professional Installation vs. DIY Installation
The line between DIY and professional systems has blurred, but the decision still depends on your time, your confidence with tools, and the complexity of the desired setup.
DIY is perfectly viable for apartment dwellers or homeowners who prefer wireless systems. If you are comfortable climbing a ladder, using a drill, and navigating a smartphone app for configuration, you can achieve a professional-grade result with systems from UniFi Protect or Reolink. The main risk with DIY is improper placement—mounting cameras too high or failing to waterproof exterior cable connections.
Professional installation remains the smarter choice if you are running dozens of cables through walls, working with multi-story structures, or installing enterprise-grade hardware. Professionals understand how to “fish” wires through attic spaces and crawl spaces to keep the house aesthetic clean.
Furthermore, they are experts in NVR configuration, ensuring your network is secure and your hard drives are optimized for the specific high-write demands of continuous surveillance.
Planning for Future Expansion
The biggest mistake homeowners make is buying a “closed” system that cannot grow. Your security needs in five years will likely look very different from today.
Always choose an NVR or DVR that has more camera channels than you currently need. If you are installing four cameras, buy an 8-channel unit. This gives you the flexibility to add a camera in the future if you build a new shed, change your landscaping, or decide to add a doorbell camera.
Similarly, prioritize cameras that utilize the ONVIF (Open Network Video Interface Forum) protocol. This standard ensures that your cameras can communicate with recording hardware from different manufacturers.
You are not locked into one brand for the life of the system, which protects your investment and ensures that you can always upgrade individual cameras to the latest technology as sensors and AI analytics continue to evolve.
Cost Considerations
Avoid the temptation to look only at the sticker price of the camera. The real cost of a system includes:
- Hardware: Cameras, NVR/DVR, hard drives, and mounting brackets.
- Infrastructure: Cat6 cabling, conduit for exterior runs, and power supplies.
- Maintenance: Subscription costs for cloud storage or the eventual cost of replacing a surveillance-rated hard drive after 3–5 years of 24/7 use.
- Labor: Either the value of your own time or the cost of a professional installer.
A professional-grade wired system often has a high entry cost ($1,000 to $3,000) but effectively zero monthly recurring costs. A simple wireless system might only cost $300 to start but could run $100–$200 per year in subscription fees for cloud storage and smart features. Calculate your five-year cost of ownership before settling on a system.
Final Thoughts
A home surveillance system is an investment in your home’s infrastructure. The most effective systems are those that provide high-quality, actionable data, operate reliably without constant troubleshooting, and cover your property’s specific vulnerabilities.
Do not be swayed by the promise of the latest “smart” marketing feature if the fundamental optics and mounting are poor. Start with a solid plan, prioritize coverage of your access points, and ensure your recording infrastructure is robust enough to handle the workload. If you see efflorescence or signs of moisture near your outdoor camera mounts, address those foundation issues before installing expensive electronic equipment.
By applying the same rigorous standards to your surveillance system as you would to a structural renovation, you ensure your family remains safe and your property remains protected for the long haul.